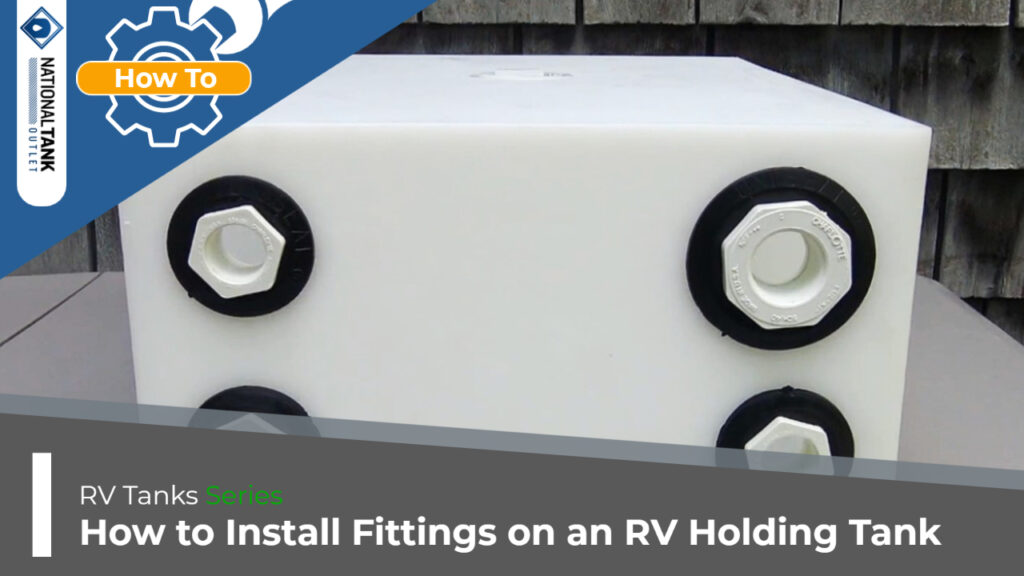
This guide will detail how to install fittings on an RV holding tank with an easy-to-follow method and eight (8) steps. An RV holding tank can refer to either the blackwater tank or the greywater tank. The blackwater tank, or simply black tank, is the container used to store human wastes that are flushed down the toilet in a recreational vehicle. The greywater tank, or gray tank, is used to collect water that drains from any on-board sinks or showers.
Can be Used for RV Freshwater Tanks Also
While this how to guide focuses on blackwater tanks, the necessary tools and procedure can be used to install fittings on RV freshwater tanks also. This is so because the different tanks are made from the same material, polyethylene plastic. The tanks only differ in their intended use and exact fabrication. Blackwater and greywater tanks are non-potable grade tanks, while freshwater tanks are potable grade tanks.
Why Replace an Old RV Holding Tank
Oftentimes, a new holding tank is needed to replace an old, well-used blackwater tank or to upgrade the storage capacity of an existing one. An old RV holding tank may need to be replaced when improper care has led to hard, nearly permanent sewage buildup, when a used rec vehicle is purchased and the owner wants to start with a fresh, clean system, or if the old tank has been damaged during movement or from chemicals.
What is a Blank Tank
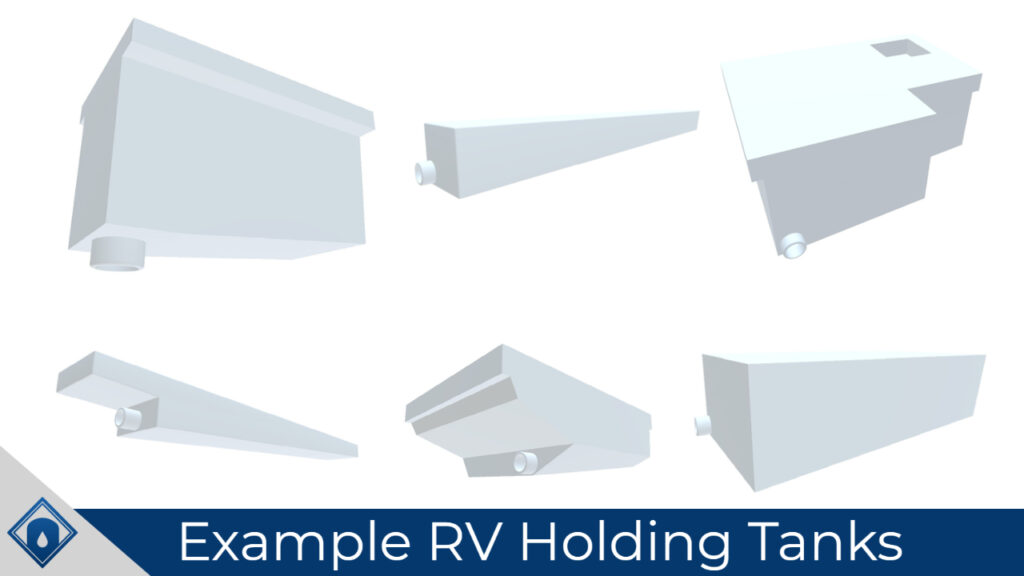
Most often, new RV holding tanks for purchase are what are known as “blank tanks.” A blank tank is a storage container without any fittings or lids already installed. Blank tanks are just the container itself. The products are provided this way to allow the customer to install and set the fittings they need to match the water system on their personal recreation vehicle. Many times, an RV holding tank is a unique shape to fit under a rec vehicle, and many times also, the installation locations and even the size of the fittings necessary are unique to the RV system.
8 Steps to Install Fittings on a Blank RV Tank
In short, to install new fittings on a blank RV tank the steps are to: order the correct replacement, get the needed tools, prep the tank, cut the holes, prepare the holes, install the fittings, and clean the now ready-to-use holding tank.
Step 1: Order the Correct, Replacement RV Holding Tank
Ordering the right RV holding tank replacement is the first step. A replacement blackwater tank or greywater tank will have the correct volume storage capacity, tank shape, and size measurements for your personal recreational vehicle.
Finding the right specifications may require pulling out your RV’s owner’s manual or getting underneath the RV. As the information may not be in the manual and the old holding tank must be removed anyway, this is likely the best option. With the old holding tank removed, the container can now be measured.
Removing the old holding tank will also allow you to determine the size, number, and placement of the fittings that will be necessary. If the size of the old fitting is not labeled anywhere on the fitting body itself or on the connected plumbing, you can use a measuring tape and measure the fitting’s inner diameter. The inner diameter is the fitting’s “size” and can be used to purchase the correct replacements.
We have listed our replacement RV holding tanks in a way that makes it easy to quickly view different product’s volume and size measurements so finding the correct tank is easier. You can find our blackwater tanks here and our greywater tanks here. They are made to fit many of the more common recreational vehicle brands.
Step 2: Collect the Needed Tools and Materials
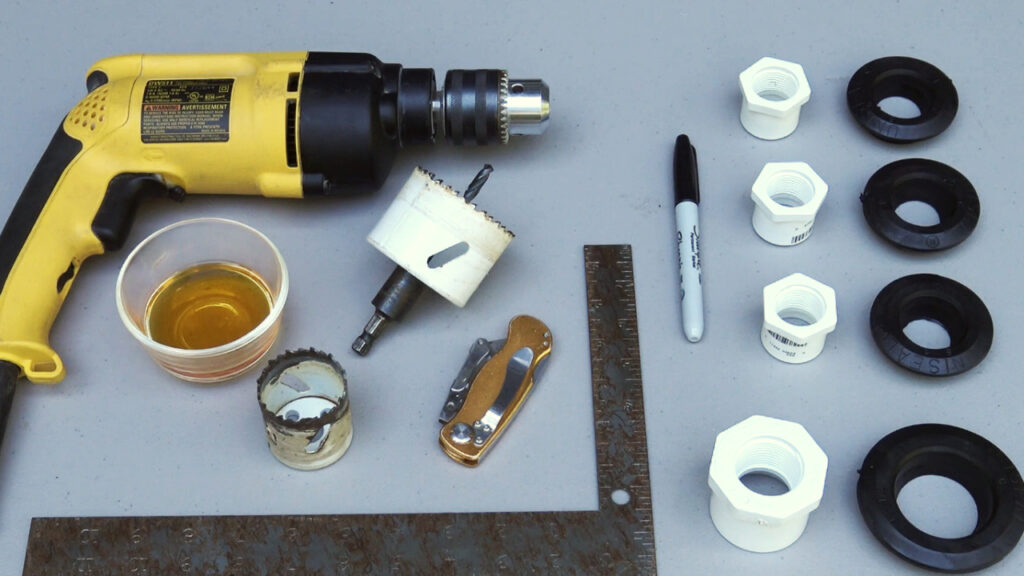
Tools and Materials Needed:
- Permanent Marker
- Square or Measuring Tape
- Power Drill (corded or fully charged)
- Hole Saw (size of fittings)
- Guide Bit
- Razor Blade or other Sharp Knife
- Uniseal Fittings (if being used)
- New Threaded PVC Plumbing Fittings
- Dish Soap
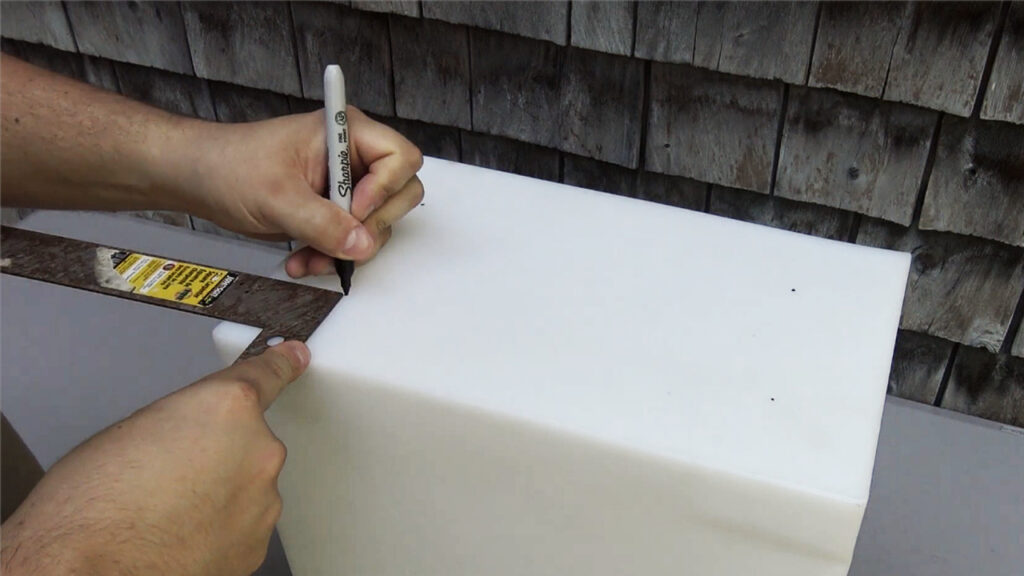
Step 3: Prep the Holding Tank
Use information from the old holding tank, the owner’s manual, or the plumbing setup beneath the RV to know where the fittings will need to be placed on the new holding tank. Use a square or measuring tape along with a permanent marker to mark the true center location for the new fittings.
Step 4: Cut Holes in the Holding Tank
Use a power drill with hole saw and guide bit equipped to cut holes into the holding tank at the marked locations that will be used to install the new fittings. A corded power drill or a fully charged battery-operated drill is recommended as RV holding tanks are made from thick, durable plastic.
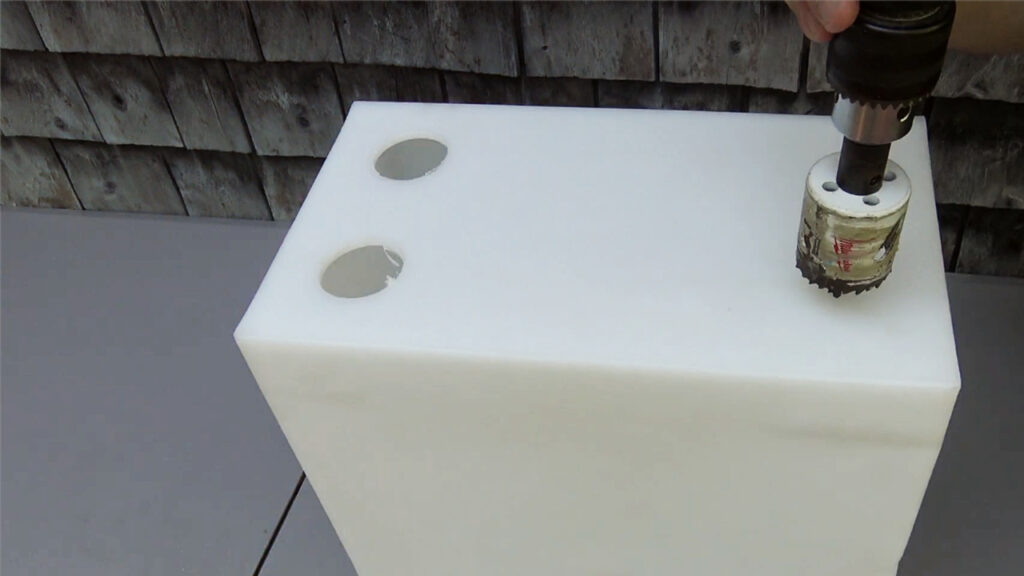
A guide bit is recommended to ensure proper alignment and a straight cut. The necessary hole saw size will depend on the size of the fittings. Many times, more than one size of hole, and therefore hole saw, will be needed for RV holding tanks
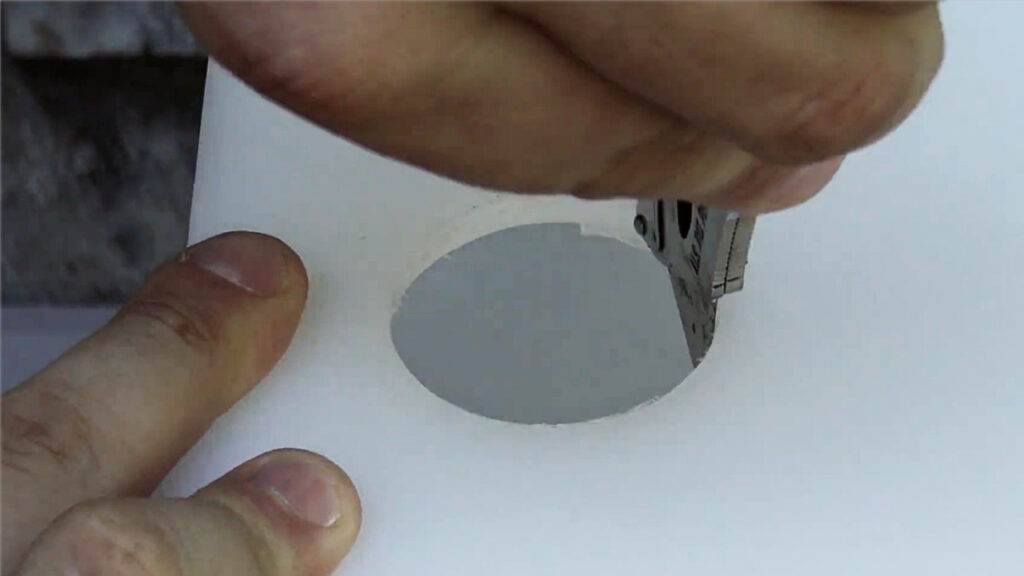
Step 5: Prepare the Newly Cut Holes
The newly cut holes in step 4 will likely have jagged pieces of plastic and abrasive edges leftover from the hole saw. Use a razor blade or other sharp knife to cut around the holes and remove any plastic burrs.
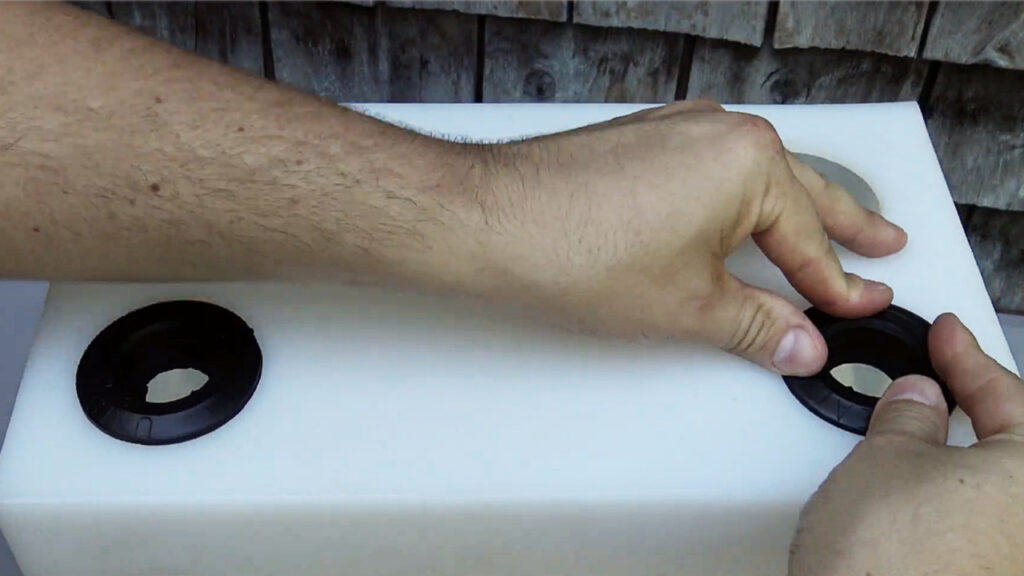
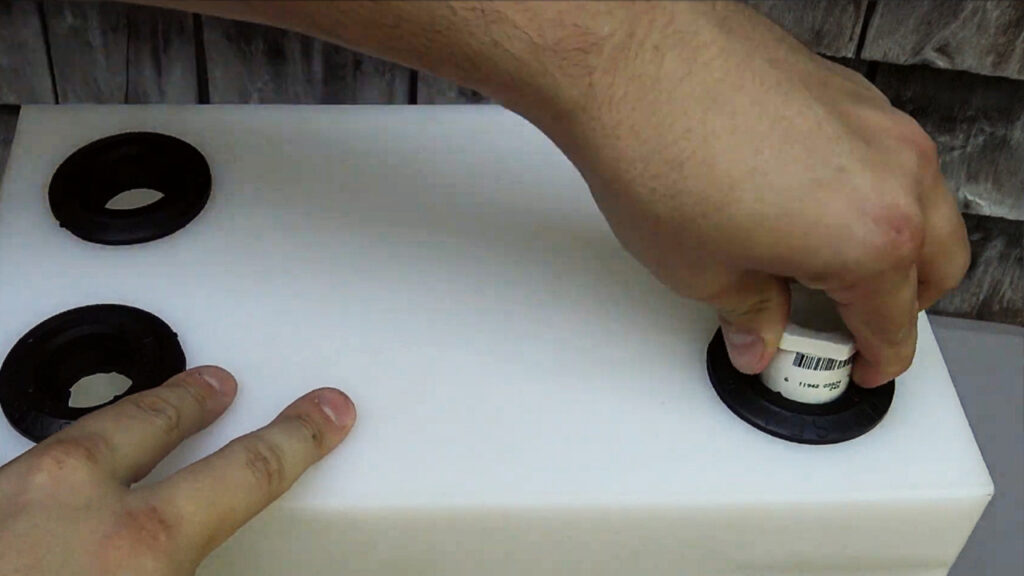
Step 6: Insert Uniseal Fittings (If Being Used)
What are known as uniseal fittings are recommended for RV holding tanks. Uniseal fittings are also recommended for use on RV drinking water tanks and marine tanks. The uniseal style fittings are easier to install compared to conventional bulkhead style fittings. Uniseal fittings simply push into place while bulkheads require access to the inside of the tank for installation, which requires a large enough hole and oftentimes, a lid to be installed.
To install uniseal fittings, firmly place them into the newly cut holes until they will not go any further. Uniseal fittings are designed to stick firmly in place to form a watertight seal and provide a location for pipe fittings to be installed.
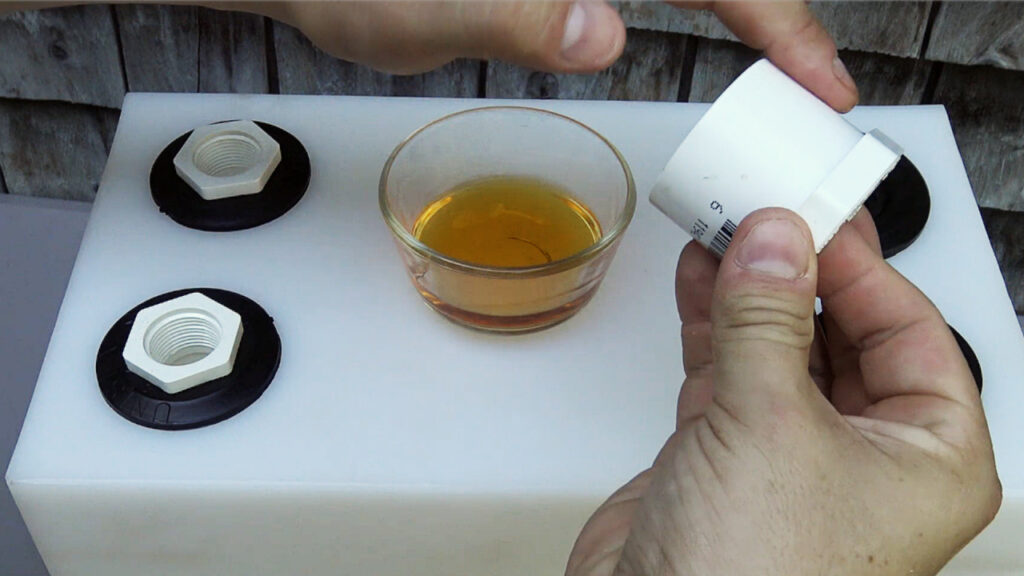
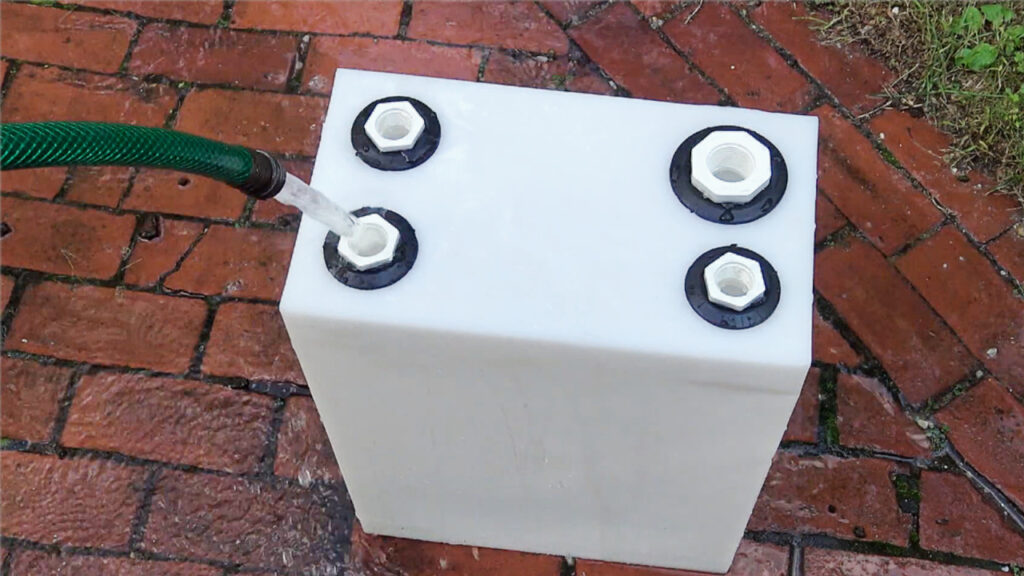
Step 7: Insert PVC Pipe Fittings
The new PVC pipe fittings are used to connect the holding tank to the plumbing beneath the RV. To install the PVC pipe fittings, use dish soap to lubricate around the PVC fitting and/or around the inside of the uniseal, then firmly insert the PVC fitting into the uniseal fittings until they will not insert any further.
Step 8: Clean and Test the Now Ready-to-Use Holding Tank
Use a garden hose or other water source to rinse and clean the RV holding tank to flush away any remaining plastic pieces. Fill the holding tank with water to ensure it is watertight and does not leak anywhere, then drain. The RV holding tank is now ready to install, hook up, and use in a recreational vehicle.
Video Summary
For a video overview and visual, see our video on how to install fittings on an RV holding tank.
Takeaway | How to Install Fittings on an RV Holding Tank
Installing new fittings on a new or replacement blackwater or greywater tank for an RV is actually a fairly simple, straightforward process. The job can be completed in just a few steps – measure, mark, cut, clean, and install – with some basic tools – marker, measuring tape, power drill, hole saw, and razor blade – and with the right parts.
If you have any further questions on RV holding tank or water tank products, contact us, our support team is always ready to help. To check out our RV tanks, you can find them here.