Water storage is an important consideration for many properties, including residential, agricultural, commercial, and industrial. Among the various options available for water management, underground water tanks offer unique advantages and are often selected for these reasons. These benefits include saving space above ground, water temperature regulation, algae prevention, and general property aesthetic and appeal.
In this post, we will present an overview on the process of installing an underground tank to provide general information about the work and expectations. Due to the differences between underground tank designs, sizes, and local geology, there are typically specific guidelines that will apply to the individual installation site and how the cistern must be installed. Many times, the underground water tank manufacturer will have set installation guidelines that should be followed. And always: hire a professional contractor if necessary.
This guide can also be used for information on how to install an underground rainwater harvesting tank.
Step 1: Water Tank Selection
The first step will be to choose an underground water tank that meets the storage capacity and material requirements needed by your intended use and specifics of local geology. Choosing the best tank will require a thorough understanding of what the underground cistern will be used for, how much water must be kept on hand for that use, and local soil conditions.
Underground cisterns can be made from high-density polyethylene, fiberglass, or metal. High-density polyethylene cisterns are fairly new and are increasing in popularity for use. Storage volumes for polyethylene cisterns often range from 100 gallons up to 20,000 gallons. Storage capacities for fiberglass cisterns are typically built-to-spec and often used in applications that require volumes in excess of 20,000 gallons.
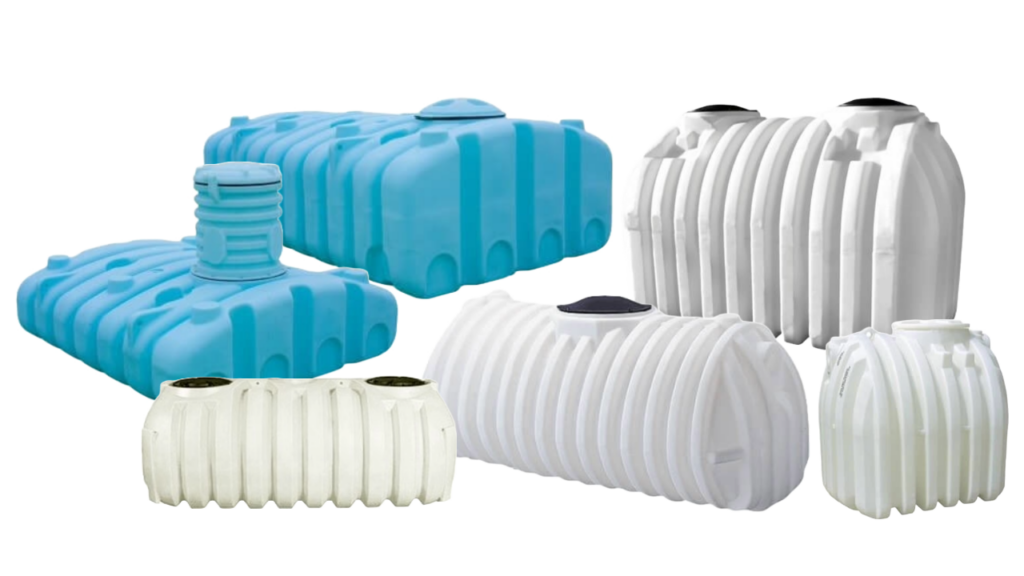
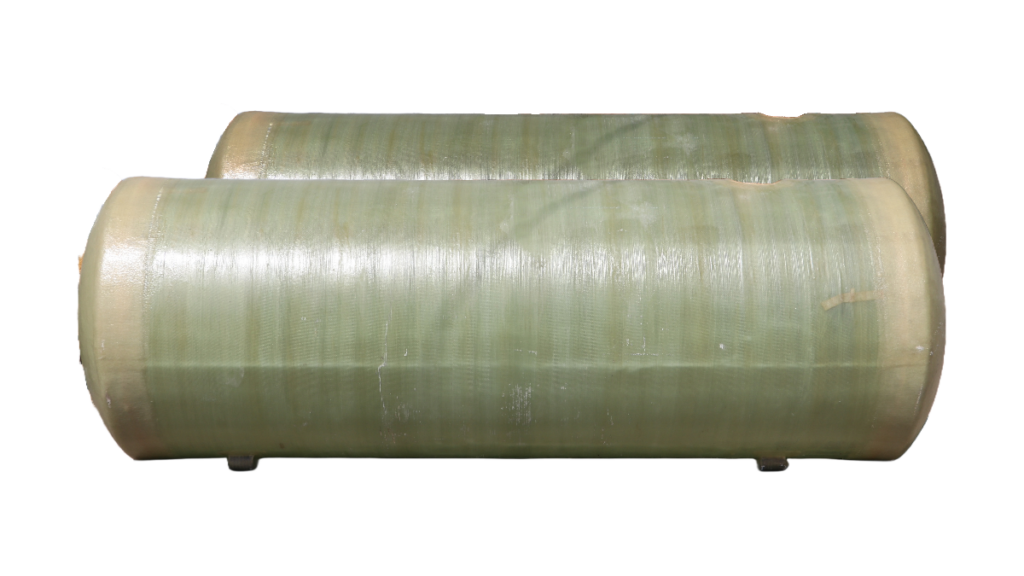
In terms of what material the cistern is made from, polyethylene and fiberglass are considered superior to metal-based tanks as they have resistance to the natural chemical properties of soil as well as low pH, acidic soils. This makes poly and fiberglass tanks better suited for a wide range of soil types and therefore better suited for underground applications by making concerns with soil conditions fairly negligible.
Step 1b: Water Pump Selection
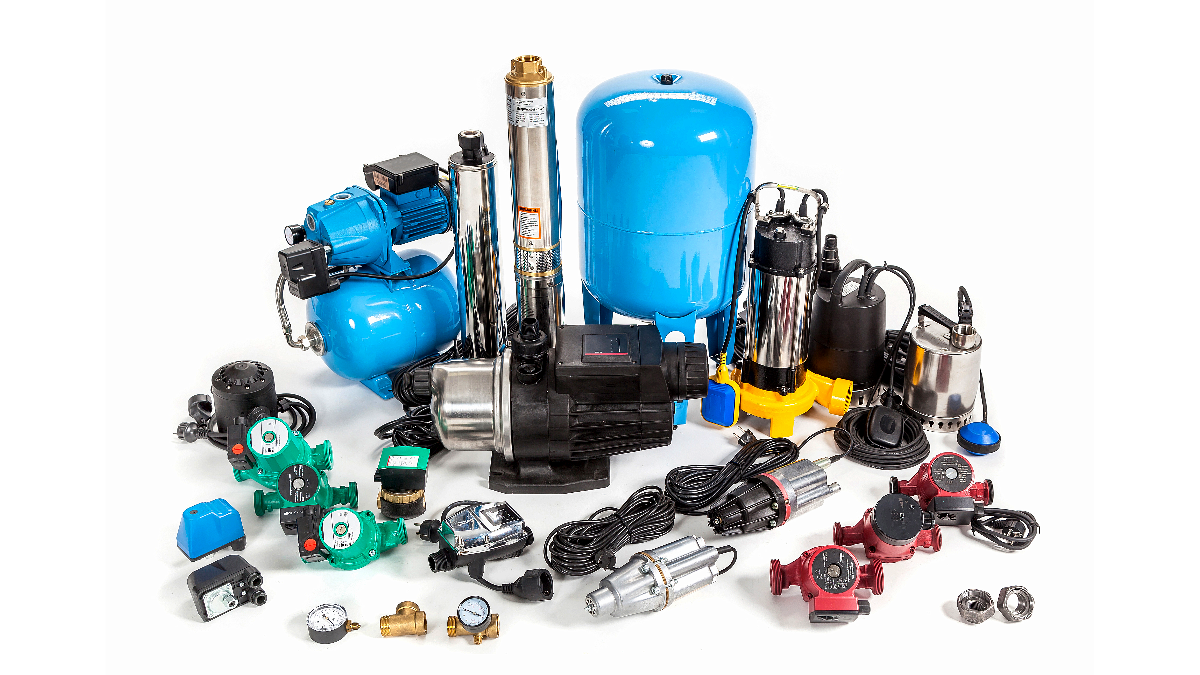
Note, a water pump will be necessary in an underground water tank setup to access the water in the cistern whenever that water is needed. Being underground, a water pump will be required to move water in the tank up against gravity as well as provide flow rate and pressure. The right water pump should be capable of providing sufficient and usable flow rates and pressure based on your anticipated applications and distance between the cistern and taps.
Shopping for and knowing which water pump will best match your setup will help in the overall planning and budgeting process.
Top pump types used in underground water storage tanks include submersible pumps, well pumps, jet pumps also known as centrifugal pumps, and booster pumps. Electric-powered pumps are the preferred type for underground water tank applications.
Step 2: Site Selection
Choose an appropriate location to install your underground tank. The best site will be one that is easily accessible for machinery and any future maintenance, have good soil quality and good drainage, and will not interfere with any nearby building foundations or underground utilities. It is often essential to check local zoning laws and obtain any necessary permits before proceeding. Obtaining permits may be required by you as the property owner, whether you will be performing the installation yourself or having a contractor perform the work. Other times, the contractor can perform all these evaluations and acquire the necessary permits.
Consider choosing a site that is as close as possible to where you need the water and the tank’s water source to limit the amount of plumbing as well as the strength and size of the necessary water pump, which will save you money in the long run.

Choose a site that is not prone to flooding or heavy rainwater runoff as this can lead to soil erosion and the potential for premature weakening of a metal underground tank if used.
Note, it is not recommended to install underground water tanks in water-saturated clay or in an area with a high water table. Also, do not install in the known path or what may be a necessary path for vehicles or heavy machinery.
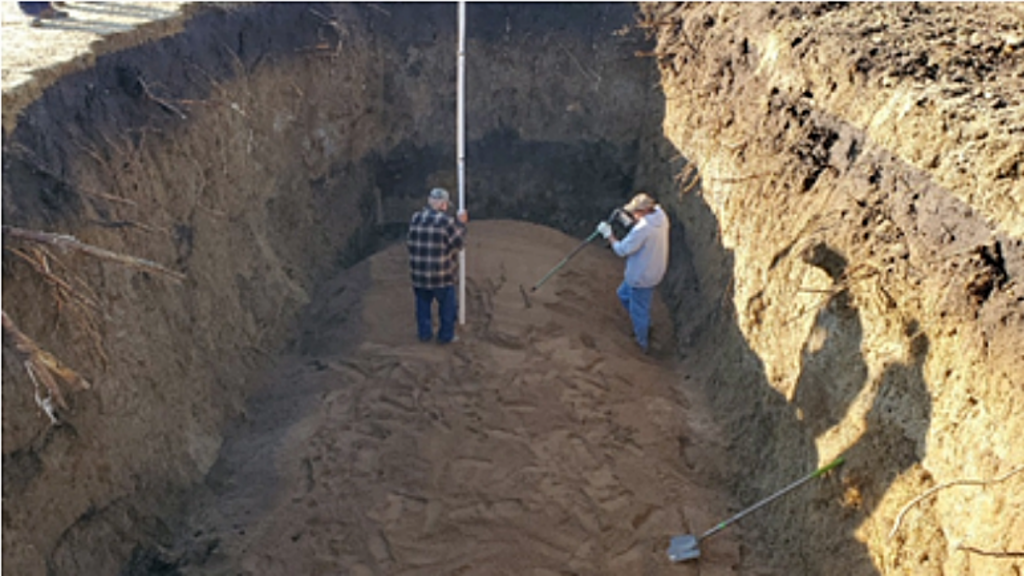
Step 3: Excavation
Once the site is selected, the next step is excavation. Due to the size of most water tanks, excavation is typically recommended to be performed by a backhoe or other digging equipment. The hole should be larger than the tank to accommodate backfill material and should have a depth that allows the top of the tank to be below the frost line but above the water table.
Common guidelines are to excavate to a depth that allows a minimum 6″ to a maximum 24″ depth of cover from the top of the tank to grade level. For width, common guidelines are to excavate an excess 18″ to 24″ on each side of the tank.
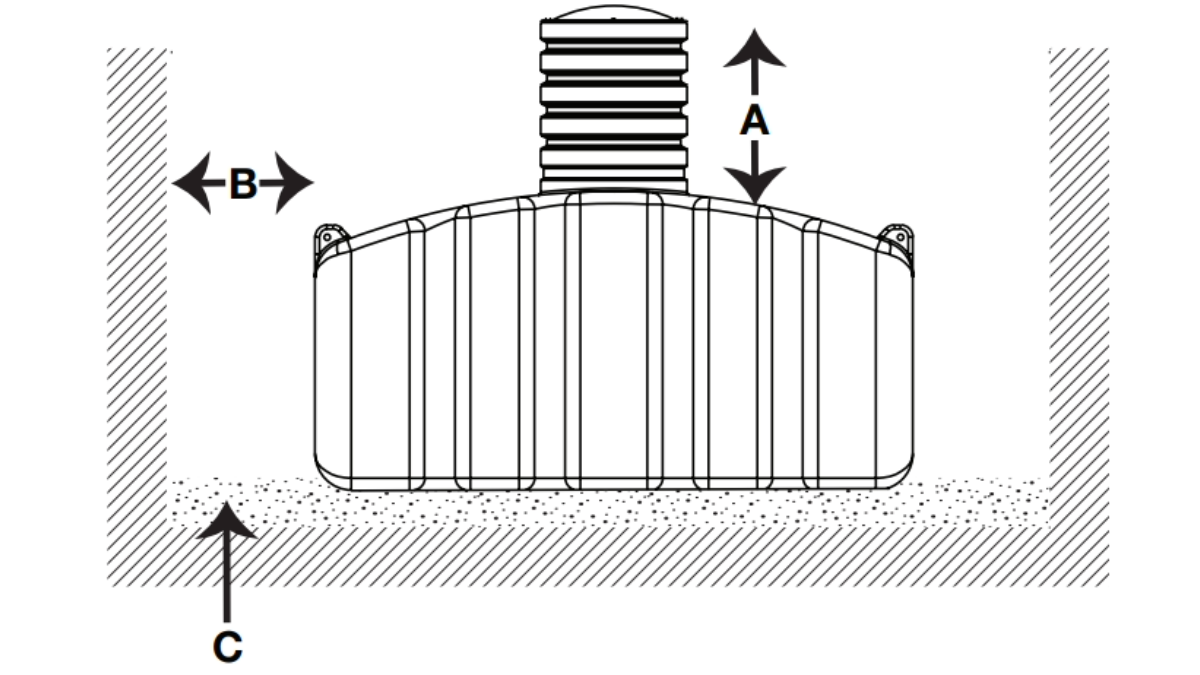
Using an example of a 1,000 gallon underground water tank: the tank has a height of 36” a width of 98” and a length of 111”, therefore the maximum recommended depth for excavation would be 60” deep by 122” wide by 135” long.

Typically, information concerning the exact depth, amount or type of backfill, and any additional support that may be needed is often provided by the underground water tank manufacturer and is specialized to the particular water tank type and size. The information and example here is provided for insight and reference on possible expectations.
For a real example, see here for a manufacturer’s underground water tank installation guide.
Step 4: Preparing the Base
The proper base for the tank within the excavation is critical for sufficient drainage around the tank. Depending on the tank type and the manufacturer’s instructions, this base layer could be a layer of sand, compacted gravel, or a gravel-sand mixture that is added to the bottom of the excavation prior to setting (bedding) the water tank.
Common recommendations are to bed the underground tank in a minimum of 6″ well-compacted sand in soil terrain or a 12″ minimum well-compacted sand in rocky terrain.
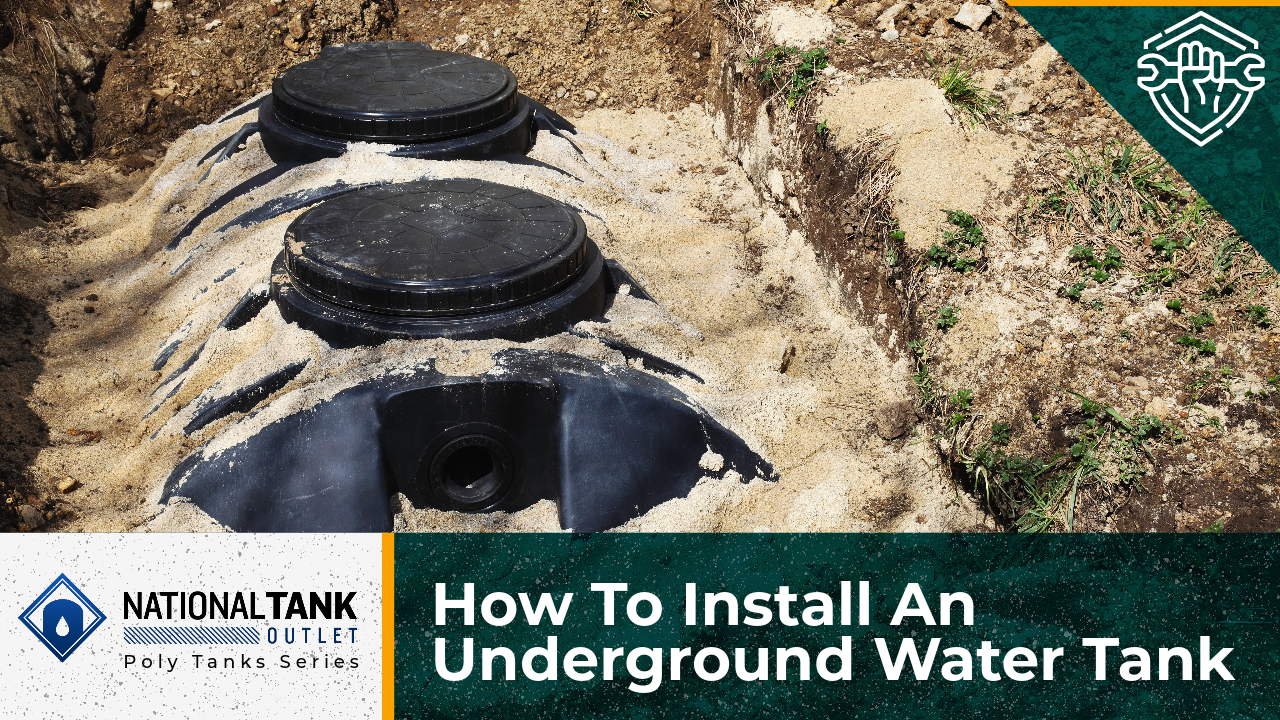
Step 5: Installing the Tank
In step 5, the underground water tank should be carefully lowered using appropriate lifting equipment down into the excavation hole that is now complete with the proper base layer. Ensure the tank is level and positioned correctly before proceeding.
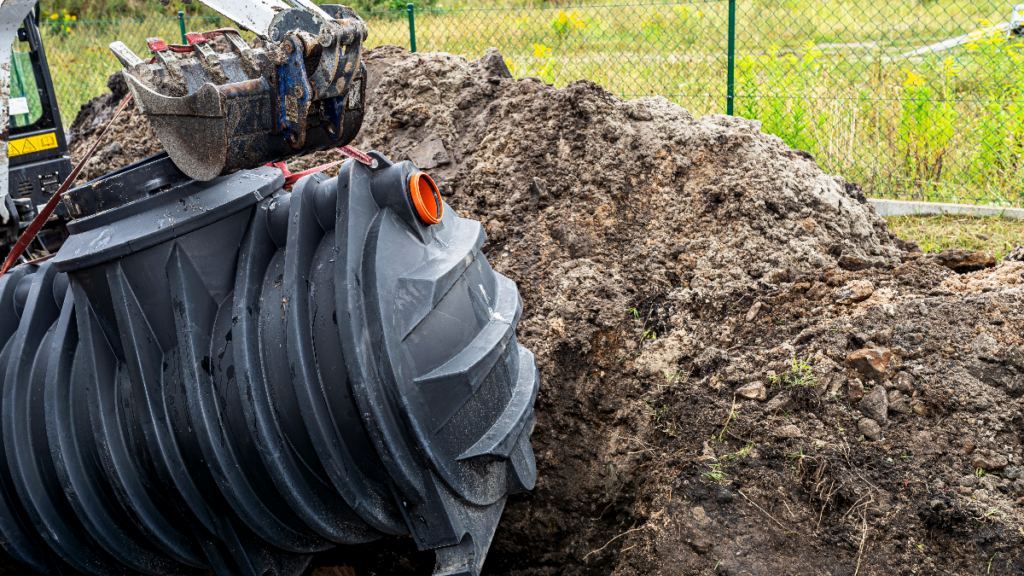
Note, for lifting, most underground water tanks feature lifting lugs and eyelets. Always use all present lugs for lifting; i.e., if the cistern has four lugs, connect and hoist from all four eyelets. Only lift an empty tank; never lift a liquid-load bearing water tank.
Step 6: Backfilling
Backfill around the tank with the recommended backfill material. This is typically either the native soil, (if suitable), or a sand and gravel mixture where the gravel is of a specific size. Recommended gravel mix is often with rocks no larger than 1-1/2″ and where 50% of the rocks are smaller than 1/4″.

Backfilling is recommended to be done in 12″ layers and each layer compacted from the outside in towards the tank to remove voids and ensure stability. Always avoid using heavy machinery near the tank to prevent the possibility of damage.
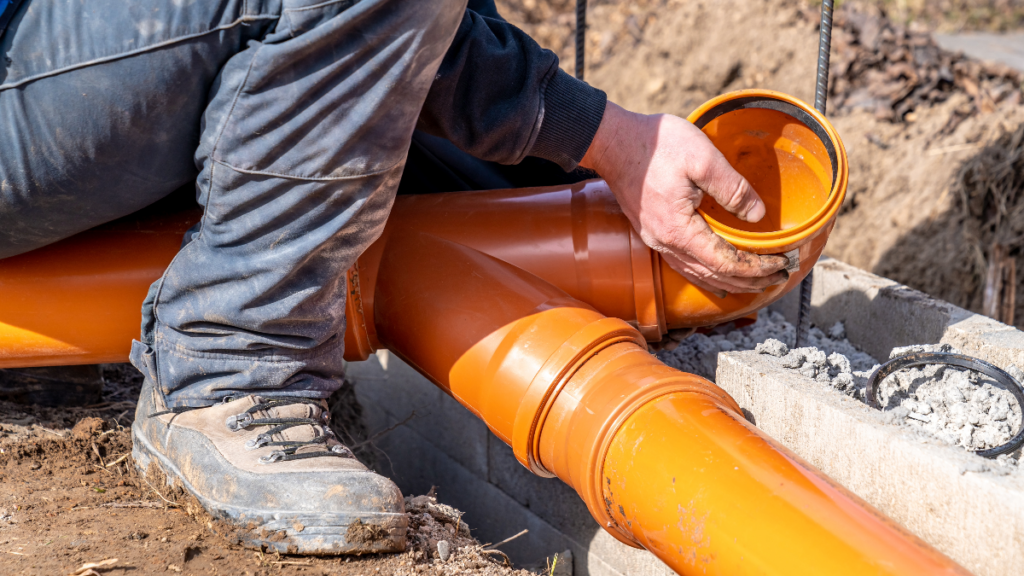
Step 7: Connect Plumbing
When backfilling reaches the fitting flats and plumbing connection ports on the underground water tank, plumbing to and from the tank should be installed and connected. At this point, connect piping to the tank in such a way that will allow connections to your water pump and property’s plumbing system. Ensure all installation is performed correctly and that connections are secure and watertight. This step may include inlet and outlet pipes, overflow systems (if applicable, such as in rainwater harvesting), vent pipe or pipes, manhole extension (if purchased), and pump connections.
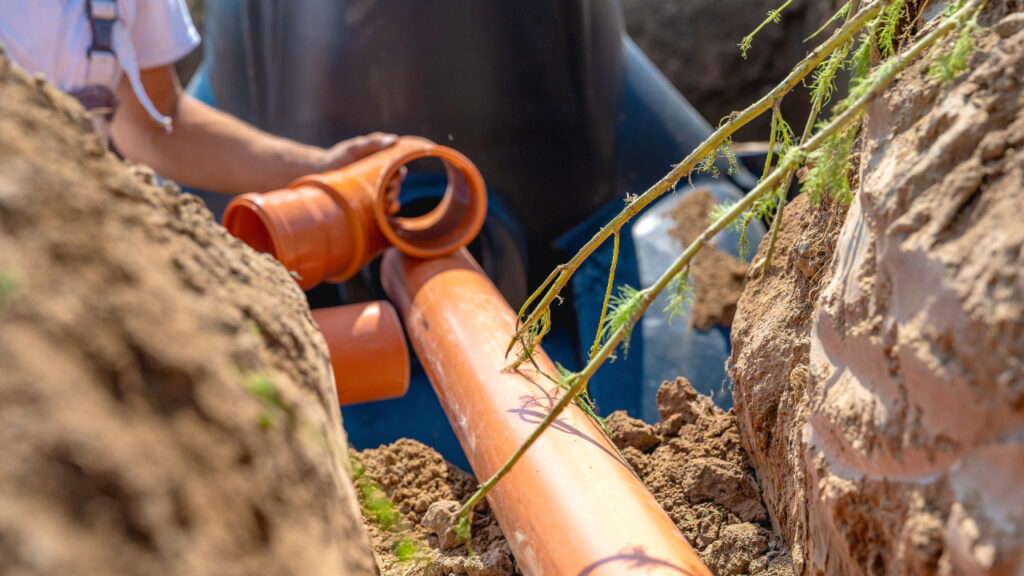
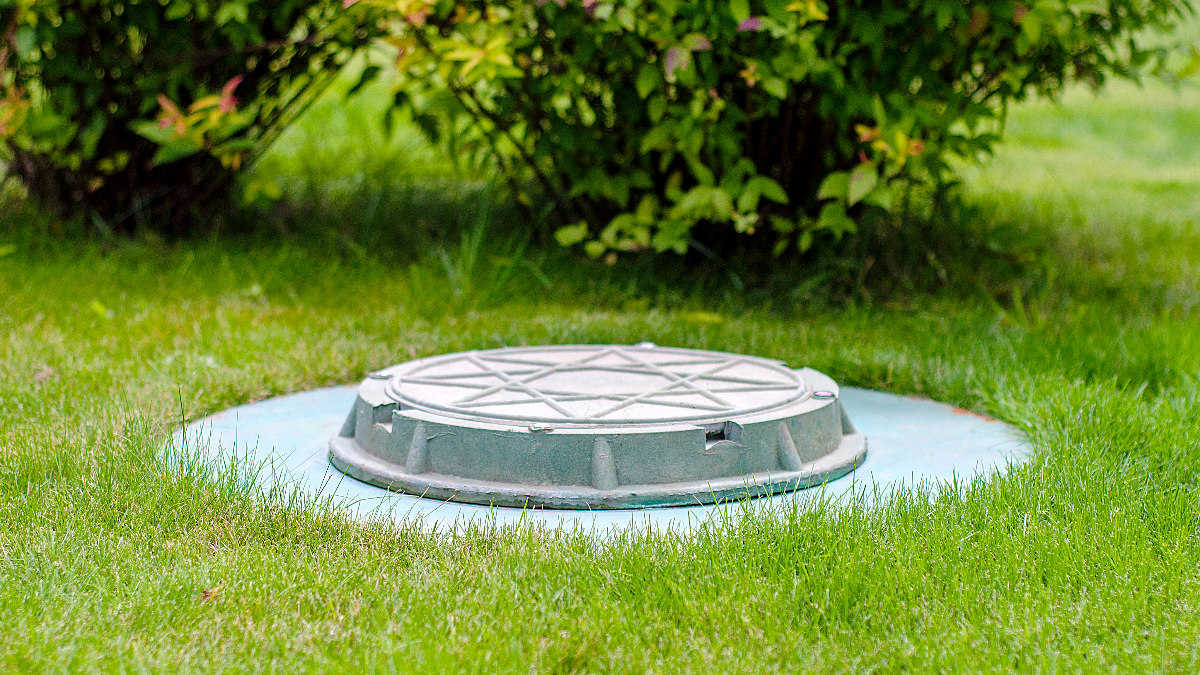
The manhole extension, also known as a manway riser, is worth mentioning at this step. The manway riser is a useful and recommended accessory for underground tanks that allows for quick and easy at-grade, surface-level access to the underground tank as needed. In effect, a manhole extension accessory extends the underground tank’s lid to the ground’s surface.
Step 8: Final Checks, Notes and Recommendations
After all plumbing and accessories are installed and set, fill the tank with water to check for leaks. When this is complete and all looks good-to-go, then finish adding in the backfill around and over the tank.
For recommendations, we recommend using ANSI/NSF 61 certified PVC pipe for plumbing and we highly recommend the purchase and use of a manway riser to prevent having to unearth the tank if access is ever needed, especially if a submersible water pump will be used. The manway riser also helps you and others to know the location of the water tank throughout the years to avoid accidentally driving over or building on top of the tank.
Takeaway
Remember, while this guide offers a general overview, the specifics can vary depending on the type of tank, local regulations, and the manufacturer’s instructions. Always follow the manufacturer’s instructions and consult with a professional if you are unsure about any aspect of the installation process.
Installing an underground water tank is a significant investment in your property’s future. It offers a solution to water storage that is effective and protective, discreet and environmentally friendly. By following these steps and adhering to the tank maker’s guidelines, you can ensure the successful installation of your underground cistern.
To view our underground water tank products, we have a full selection of polyethylene cisterns, or you can learn more about our fiberglass tank options. For questions or personal quotes, contact our professional support team today.