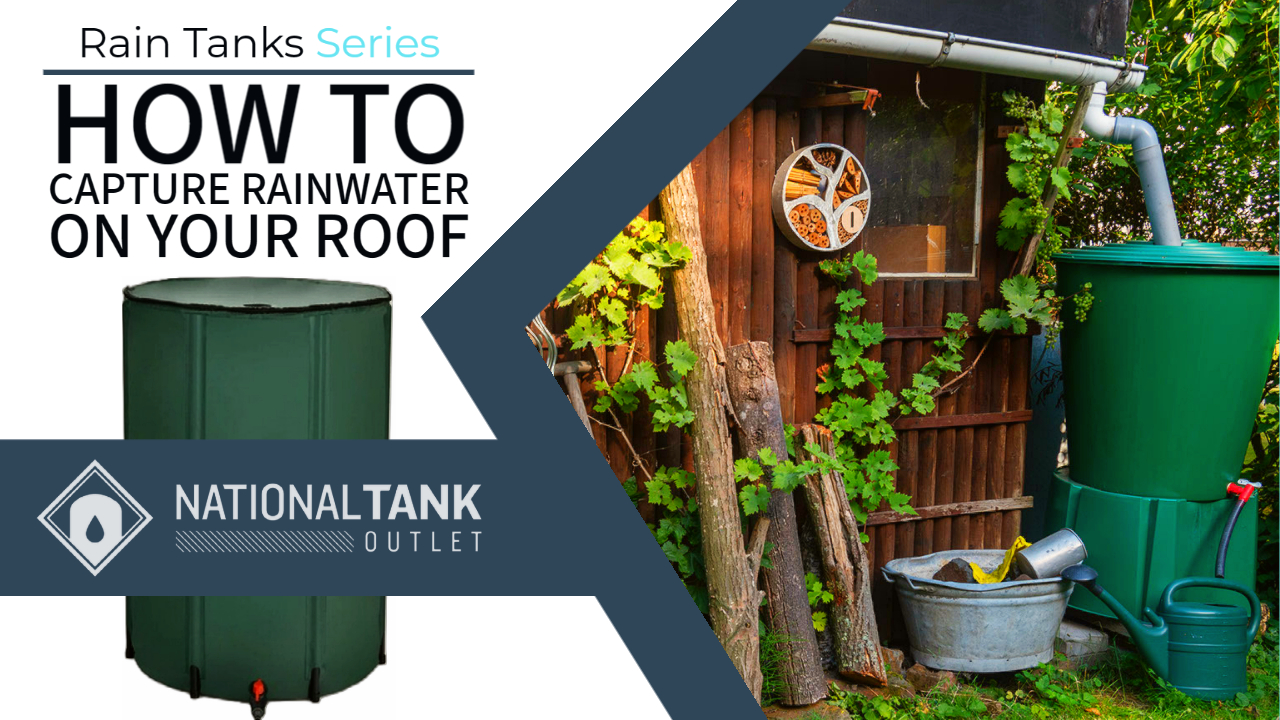
Interested in rainwater harvesting? Want to know more about the practice and how to best capture the rain that falls on your roof? In this Rain Tanks Series post, we will look into how to capture rainwater on your roof, what is needed, recommended, and some common, important points.
Rainwater harvesting is the practice of collecting regular amounts of rainfall to supplement a water source or to fully provide a property’s water needs. Rainwater harvesting has been increasing in its popularity as well as how easy it is to implement. People often harvest rainwater to help conserve water, to be more environmentally friendly, or to supply the water needed for living.
Using the roof of a home is most commonly used but rain can be harvested from other structures. Capturing rainwater can be done from the roof of any barn, livestock shelter, equipment shed, warehouse, commercial business and even specific structures designed and built for this alone.
Roofs are often used for several reasons. Roofs are readily available, have been built to deflect rain, often have large surface areas, and typically already have features for directing rainwater such as gutters and downspouts. The large surface area of many roofs makes capturing and storing large and useful volumes of rainwater relatively easy.
In practice, collecting rainwater using your roof can be a straightforward process that results in fairly unclean but still usable water or a multi-step process that can provide water clean enough to drink and other potable applications.
The following sections will detail recommended points and steps on how to best capture rainwater using a roof.
Know the Area of Your Roof
Roofs are highly effective in catching and directing rainfall. The amount of rain that can be harvested will directly depend on the size of the roof. Larger roof sizes will provide greater volumes of rainwater, and the opposite is also true. Knowing your roof’s total area will allow you to approximate how much rainwater can be potentially collected and how far it will go for what you want to use it for.
The equation for estimating rainfall collection:
Rainfall Volume x Roof Area x 0.623 = Gallons of Water
*Note, to use the equation: rainfall volume should be in inches and roof area in square feet
Let’s demonstrate the volume potential for rainwater harvesting with an example.
Mr. Rainman and his family live in Austin, TX where they annually have 32.5 inches of rainfall and want to harvest rainwater from their 1,200 square foot home. Using the rainwater harvesting collection equation, Mr. Rainman and his family could potentially collect 24,297 gallons of water every year.
Consider our other Rain Tanks Series posts for more info on how much rainwater can I collect and consider the U.S. Climate Normals provided by the NOAA to find the expected annual rainfall for your location.
Use Quality Roof Materials
If it is possible, choose quality roof materials to harvest rainwater. This point mostly applies to foresight, remodeling, and in new construction. Most roofs are designed with a layer of material intended to be impermeable to water infiltration and protect the materials of the building below, so any structure built exclusively for rainwater harvesting should also be made of impermeable materials.
For rainwater harvesting, polymer-coated roofs are best, followed by galvanized steel, steel and aluminum. Asphalt shingles are perhaps the most common and are acceptable. Asphalt shingles can release roofing material, but this is not usually a concern except when the rainwater will be used for potable applications, equipment, and irrigation systems, making it best when asphalt shingles are further coated with a sealant type product.
Concrete and wood materials can also be used for rainwater harvesting. Wood materials are least recommended and are best when either painted or sealed with a non-toxic, weatherproof product.
Roof Angle
While you may not be able to simply adjust the angle, or pitch, of your roof without reconstruction, certain slopes are best for rainwater harvesting. This section is mostly reserved for individuals building a structure with rainwater harvesting in mind but is also informational. In general, there are three types of roof angles: low, medium, and high.
(For the building savvy, these are roof pitches 3/12 for low slope with a 14.04° angle, 6/12 for medium slope with a 26.57° angle, and 9/12 for high slope with a 36.37° angle.)

Low Angle Roof

Medium Angle Roof

High Angle Roof
Low angle, gentle sloping roofs are best for ensuring limited to no rainwater is lost and the maximum volume of water can be harvested. The low angle causes rainwater to flow slowly over the roof and will help to prevent water loss from overflowing gutters during downpours. On the other hand, a low angle does not clean as well as higher angled roofs. This means a low angle roof has a greater potential to accumulate debris, grow moss and algae, and a greater tendency to experience animal activity.
High angle, steep sloped roofs are best for cleanliness and limiting animal activity but can potentially result in water loss during heavy downpours. The steep roof angle increases the speed of rainwater as it flows over it, and when there is significant rainfall, the water surge can overwhelm gutters and downspouts resulting in spills and less harvested rainwater.
Medium angle roofs are in between low and high angled roofs and so provide a trade off between benefits and potential concerns.
Direct Roof Runoff
The rainwater that flows from the roof is called runoff and needs to be directed to where you want so you can harvest it. Without any additional measures, runoff will simply flow to the ground. Many rainwater harvesters employ gutters, downspouts, and pipes to collect and channel their rainfall to a container.
Steel, aluminum or vinyl gutters with leaf guards or debris traps are best for rainwater harvesting. The most successful channeling may connect several or all downspouts together to direct rainwater into a rain barrel or rainwater collection tank.

Additional materials will likely have to be purchased to connect multiple downspouts together or if your container is located at a distance from your property. Schedule 40 PVC pipe that is ANSI/NSF Standard 61 certified is recommended for piping. Common PVC pipe sizes used in rainwater harvesting are 2 inches, 3 inches, and 4 inches in diameter.
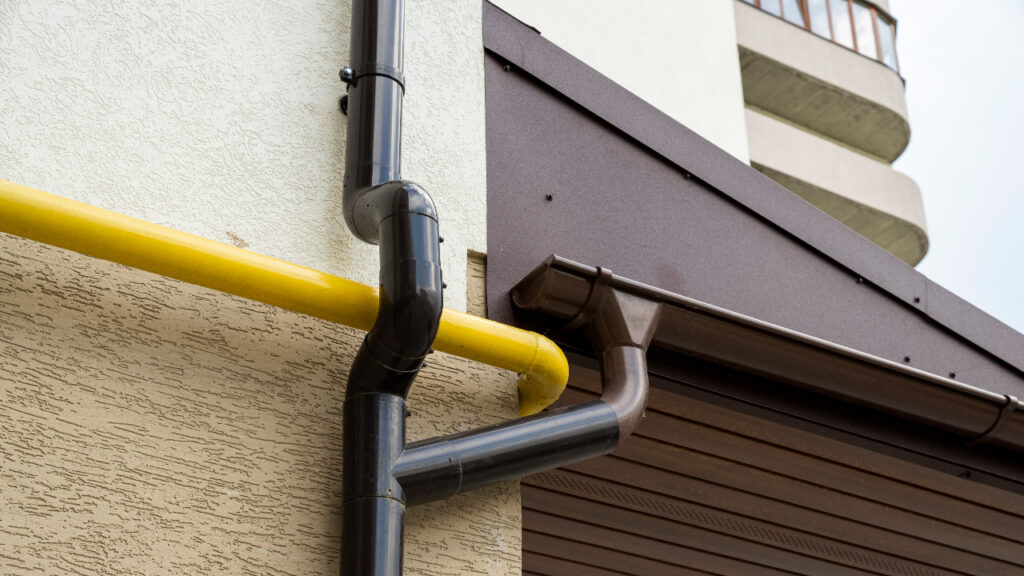
Any additional gutters or piping are recommended to be built with a decreasing slope of 1/2 inch for every 10 feet, at minimum, to maintain water flow.
A downspout will usually have to be cut, added onto or in some way modified to install rain harvesting accessories or to position the rain container.
Use Pre-Tank Filters
Rainwater that flows over a roof will often pick up contaminants of various kinds. Plant matter such as leaves, sticks, and pollen as well as animal matter such as feathers, dead remains, and excrement are common.
While they may not remove all contaminants, what are known as pre-tank filters make excellent additions to a roof rain harvesting system. Example rainwater pre-tank filter products include the leaf eater (also known as a rain head), the tank screen, and the maelstrom filter.
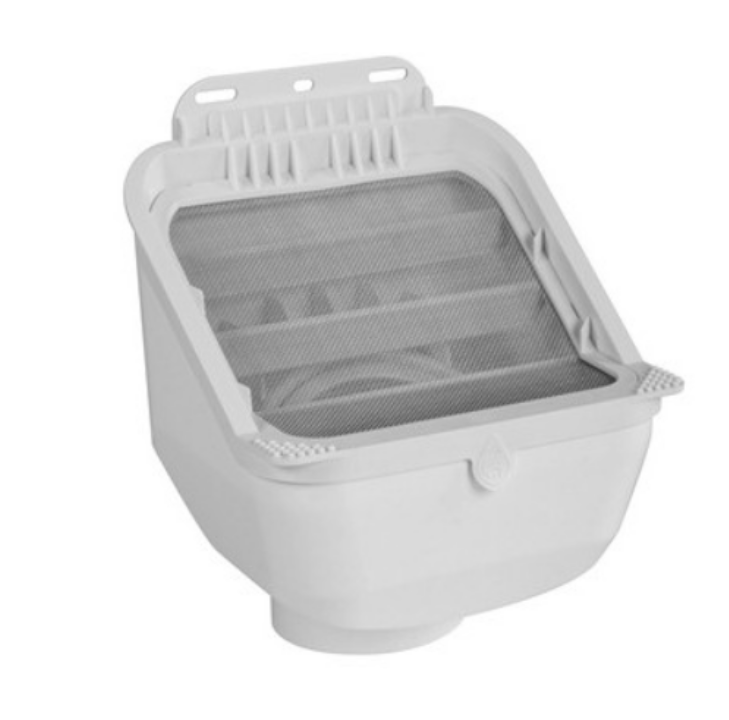
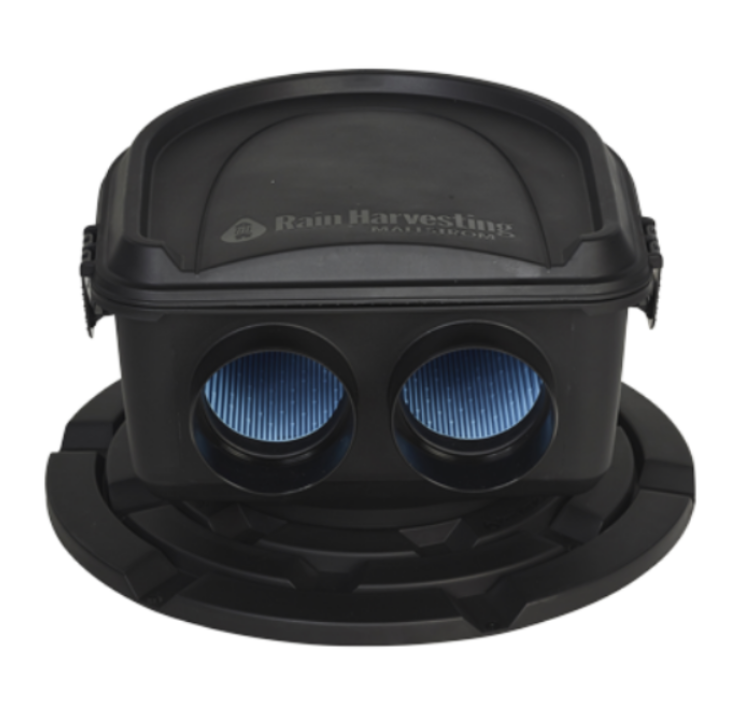
Pre-tank filters are often stainless steel screen meshes that guttered rainfall must flow through before reaching the container. When water passes through the screen, objects larger than the mesh will be removed. Keeping such objects out of a rain container will reduce regular maintenance, help prevent water spoilage and increase overall water quality.
The only note concerning pre-tank filters is that miniscule or microscopic contaminants such as chemicals, allergens and microorganisms like bacteria will still pass through to the tank. A rainwater accessory known as a first flush device can assist with this, otherwise, post-tank filtration, chemical treatment, and/or UV light installation will be required to provide the cleanest rainwater suitable for high-purity uses.
Use a First Flush Diverter
First flush diverter function on the idea that the first portion of rainwater that falls from the atmosphere to flow over a roof for harvesting is the dirtiest. Indeed, the initial rainfall scrubs the air, dissolving and carrying with it atmospheric pollutants such as soot and exhaust. How dirty the air is will somewhat depend on where you live and the amount of human activity in transportation, industry, and agriculture.
A first flush diverter is a rain harvesting accessory that collects the first portion of polluted rainfall and discards it as waste rather than letting it reach the water tank. The first flush allows your rain system to be washed over prior to collecting water, allowing cleaner water to reach your storage.
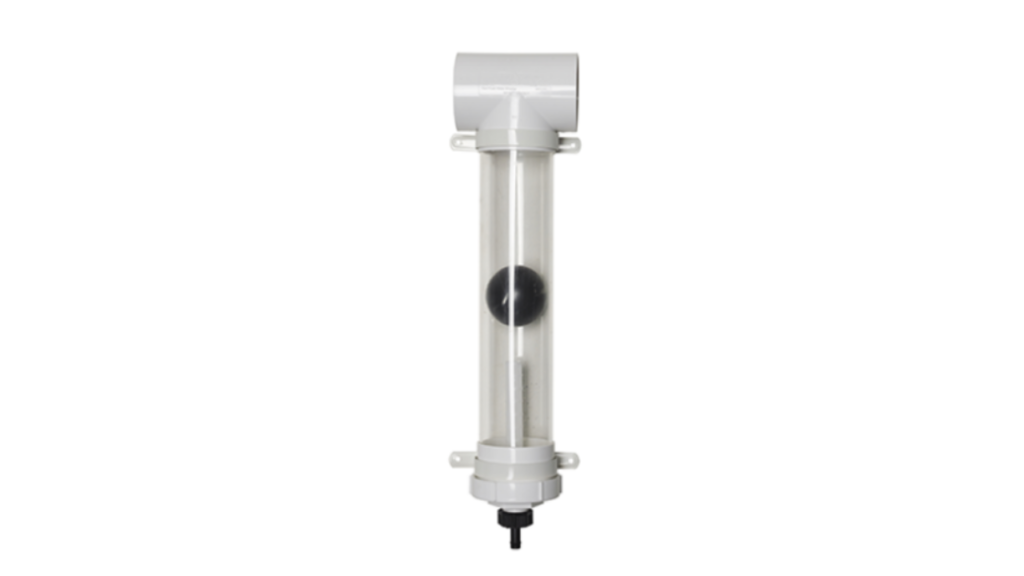
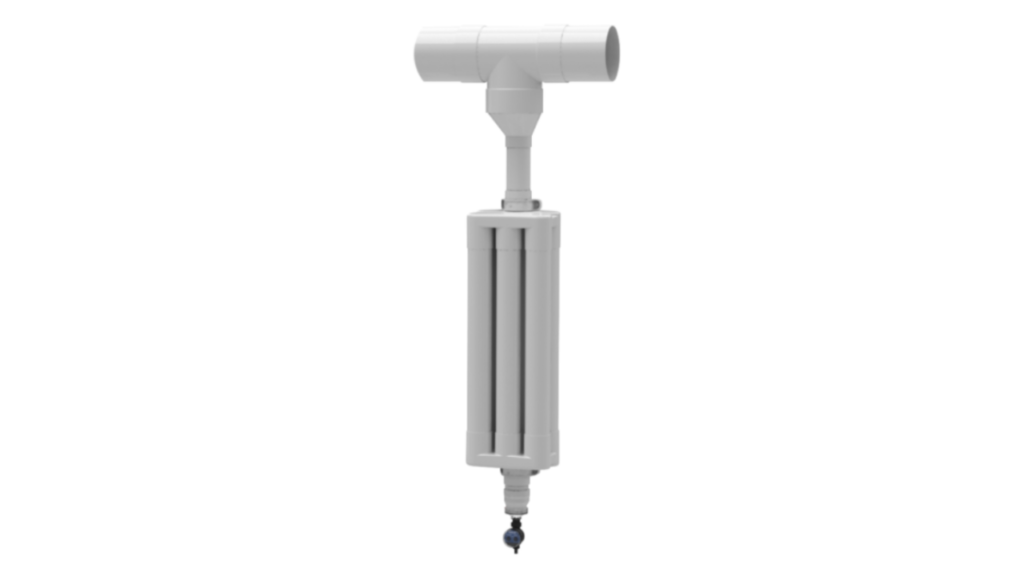
For more on how they work and installation, see our Rain Tanks post First Flush Diverter Explained.
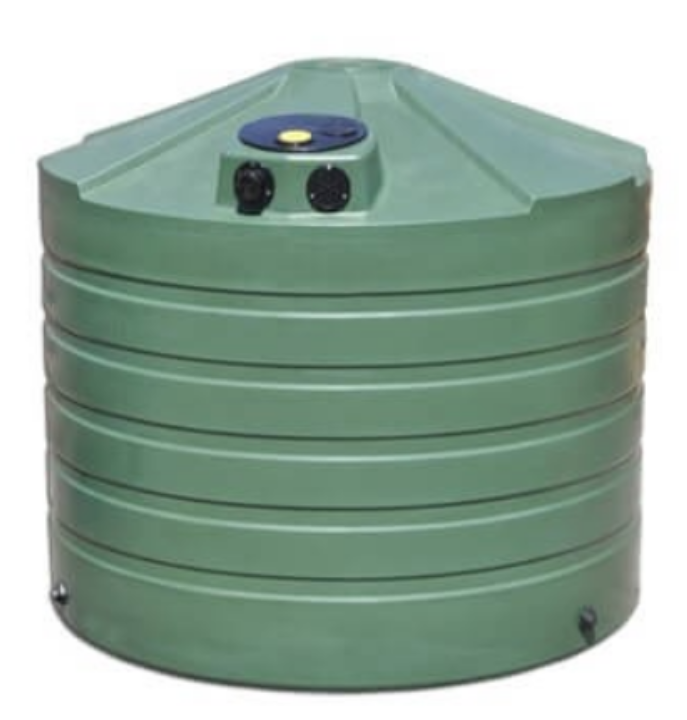
Use a Quality Storage Tank
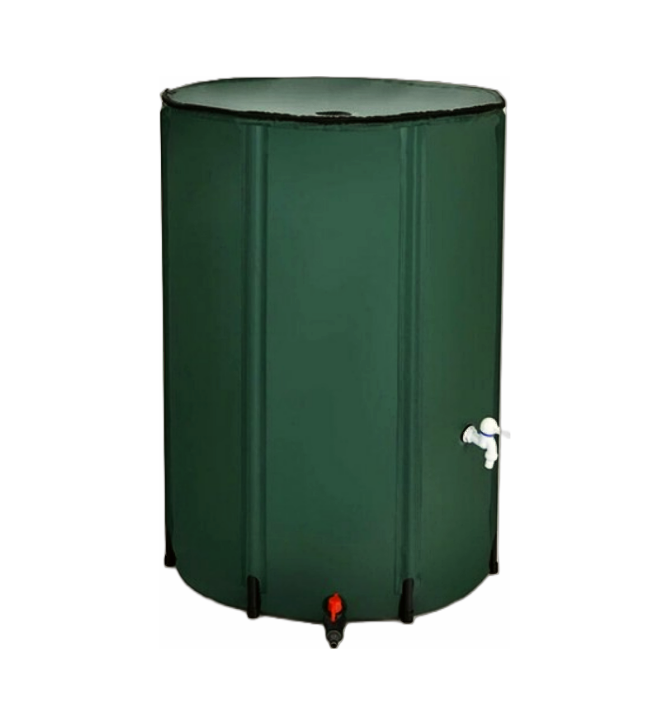
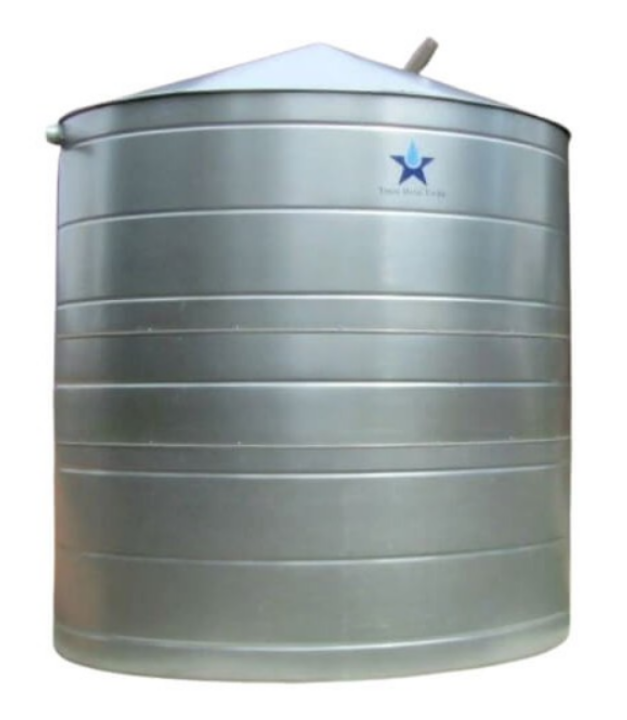
After the roof, gutters, and any accessory components, successful rainwater capture ends at a high quality storage tank. So rainwater can be used when and where it’s wanted, it must be stored in some kind of water tank. Water tanks commonly used for rainwater harvesting include rain barrels, IBC totes, and bulk volume storage tanks made from plastic or metal.
Rain storage tanks are available in many size volumes, shapes, colors, and built from different materials.
- Size Volume: A rain container can be sized to store anywhere from a few gallons to over 100,000 gallons of rainwater.
- Shape: A rain container will be either cylindrical, rectangular, or cube shaped. The slimline rainwater harvesting tank is thin enough to fit through doorways and increases options for placement and makes for easier handling.
- Colors: Common colors for rain containers are blue, green, black, brown, and beige as these colors are best at preventing the growth of algae.
- Build Material: Rain containers are made from either polyethylene plastic, PVC plastic, galvanized steel metal, or stainless steel metal. Earthen containers made from concrete or clay are also sometimes used.
The most common material used is high density polyethylene, a safe, stable, and rust proof plastic. When polyethylene is used for rainwater, it should be made using virgin resin approved for food use by the FDA that is BPA free and meets ANSI/NSF 61 Standards for drinking water uses – like the ones we have here. These standards show the right research, materials, and manufacturing steps have been done to certify the tank is safe and healthy for long term water storage and use.
Make Connections, Modifications, and Hookups
As mentioned, gutters and downspouts may have to be cut, added onto, or modified to make room for your rain container, to install accessories, or so rainwater is directed into your container. Many times, a rain container is set up right under a downspout next to a building. Other times the container is positioned away and plumbing must be run to the container. When additional plumbing is needed for your rainwater setup, Schedule 40 PVC pipe with ANSI/NSF 61 and/or ANSI/NSF 14 health labels is commonly used.
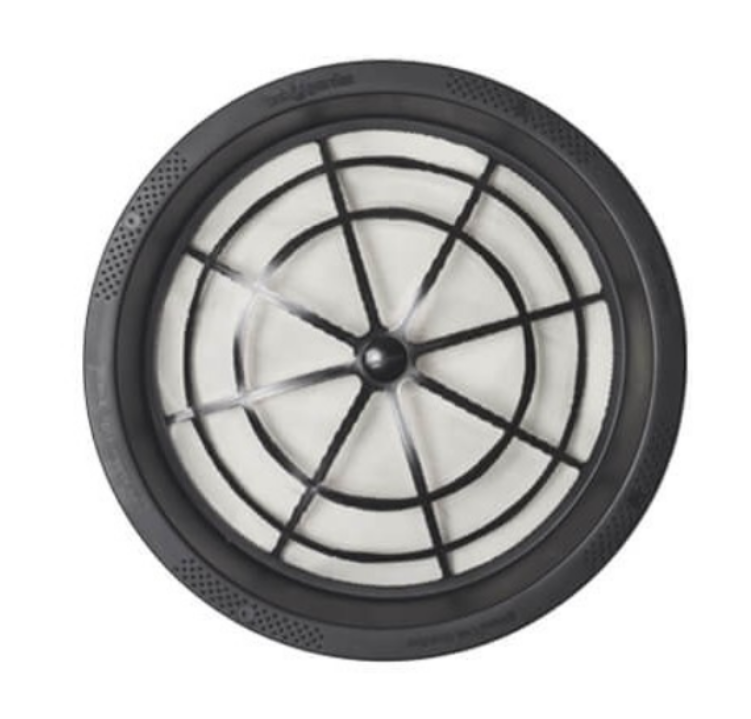
For open-top containers, such as rain tanks and rain barrels where rainwater flows directly into the top of the tank, a tank screen should be used to keep debris and animals out of your rain container. Many rainwater harvesting containers come with pre-installed bulkhead fittings that are used to make plumbing connections to and from the rain container.
What are known as bulkhead fittings are connection ports installed on the container that are used to connect plumbing such as PVC pipe, valves such as spigot valves and ball valves, or garden hoses when a garden hose adapter is also used. Rain tanks often feature several bulkhead fittings.
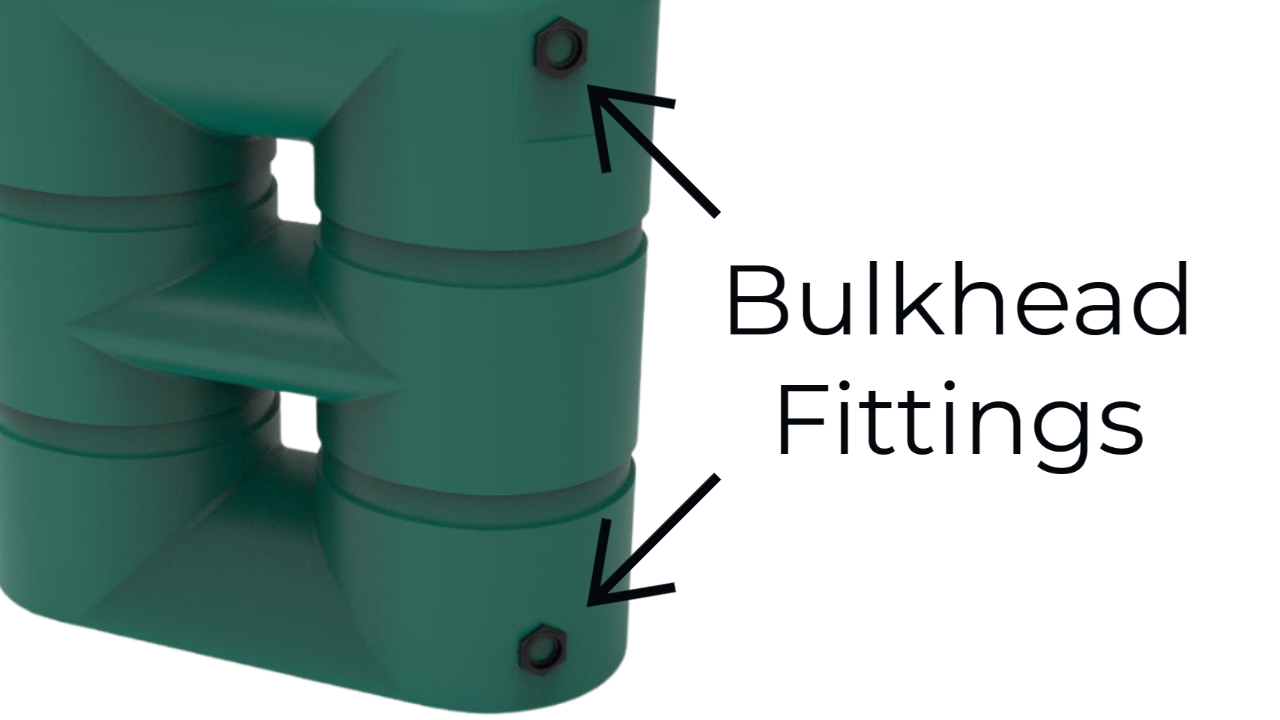
A bulkhead near the top of the tank is used as either an inlet to accept rainwater or to connect more than one container together. A bulkhead near the bottom of the tank is used as an outlet for withdrawing water for use or to drain the tank. A special fitting known as an overflow port is used to discard excess rainwater when the tank is full.
When you have decided how you will connect your container to collect rain from your roof and how you will withdraw and use your water, you are ready to begin harvesting rainwater and become an official rainwater harvester.
Takeaway | How to Capture Rainwater on Your Roof
Capturing rainwater using the roof of your home or other property structure can be a simple or multi-stage application. The practice can be as simple as setting up a rain barrel or tank directly beneath a downspout or built out with enough accessories to provide potable grade water, or somewhere in between.
The best roof-based rainwater system will feature a good, clean roofing material, shielded gutters, pre-tank filters, a first flush, a tank screen, all connected to a quality rainwater tank and any post-tank purification if needed.
If building your first rainwater harvesting system or looking to better your current setup, we hope this how to guide has helped provide some straightforward, informative insight.
Also, in rainwater harvesting, repeat algae growth in the water tank is both a common complaint and maintenance nuisance. If you want to try to prevent this, consider our research on 10 ways to reduce algae in your water tank.
For our rainwater harvesting products, you can find our storage containers here and our harvesting accessories here. If you have any questions, comments, or needs, never hesitate to contact our support experts.