What is A First Flush Diverter Device?
In rainwater harvesting practice, a first flush diverter device is a companion accessory and add-on component used to promote a cleaner rainwater harvest. First flush devices are simple by design and are made to collect and discard a select amount of the first rainfall as waste.
First flushes are also known as roof washers and standpipes. Their general purpose is to improve the overall quality of water that reaches a rainwater container for storage and use. The accessory does this by collecting rainwater that may contain unwanted material in the rain and from the catchment area, gutters and any plumbing.
Rather than making it to the rain collection container, the first volume of potentially unclean rainwater is flushed away by the first flush accessory. First flush diverters are available in both residential or commercial models and can be above ground or underground accessories designed to be integrated into a complete rainwater system. Which one is best will depend on the system setup and size.
Why Do Rainwater Harvesters Use First Flush Devices?
Rainwater harvesters use first flush devices to support the collection of cleaner rainwater. Otherwise, unclean water may make it to the container, cause spoilage or increase the undesirable growth of algae and microorganisms that can lead to biofilms and scum buildup.
Many believe rainwater to be clean water that is naturally safe for consumption. While this is mostly true, it may not always be the case. Rainfall cleanliness will vary depending on the cleanliness of your rain catching area and your exact geographical location and proximity to cities and human activity.

Many professionals and authorities agree that even direct rainfall may not be clean until after the initial downpour has effectively “scrubbed” the atmosphere of any pollutants. A first flush diverter collects some of this initial downpour to flush it away rather than collect it in your rain container.
What is in that First Rainfall?
Prior to a rainfall event, there are dust particles and potential chemicals that may be in the atmosphere due to human activities such as vehicle exhaust and industrial emissions. The first amount of rain falls over and through these contaminants, picking them up, and at the same time, cleans the air for the rainwater that will follow. This first rainfall then lands on the rainwater harvesting system catchment area or roof, which too can be dirty. Many experts consider the first 10-20 minutes of rainfall to be the initial rainwater that “scrubs” the atmosphere.
Depending on your specific environment and closeness to farming and/or industry practices, the roof can be a collection area for organic matter and debris such as sticks, leaves, animal droppings, decaying tissues and associated bacteria as well as inorganic matter such as soot, metal compounds, and chemicals from fertilizers, pesticides, and byproduct gasses from industrial activities.

Successful rainwater harvesters do not want these harmful or dirty materials making it to their semi-precious collection tank that they want to use around their property. Therefore, they choose to use first flush diverting devices, which are known to:
- Support the collection and storage of cleaner water
- Improve overall quality of harvested rainwater
- Decrease tank and system maintenance frequency
- Reduce or remove sediments, particles, and dissolved matter
- Improve water pump service life, if one is being used
- Improve service life of appliances and equipment that use the rainwater
- Reduce microbiological growth and tannin deposits
- Be easy to install and use
How Do First Flush Diverters Work?
First flush diverters work by using a dedicated chamber to collect the initial rainfall as it flows through the rainwater harvesting system. The accessory functions on the concept that the initial rainfall that may contain undesired organic and inorganic particles, sediments, dissolved chemicals, metals, and/or bacteria is allowed to fill the first flush device but not leave except through the bottom discharge port where it gets discarded.
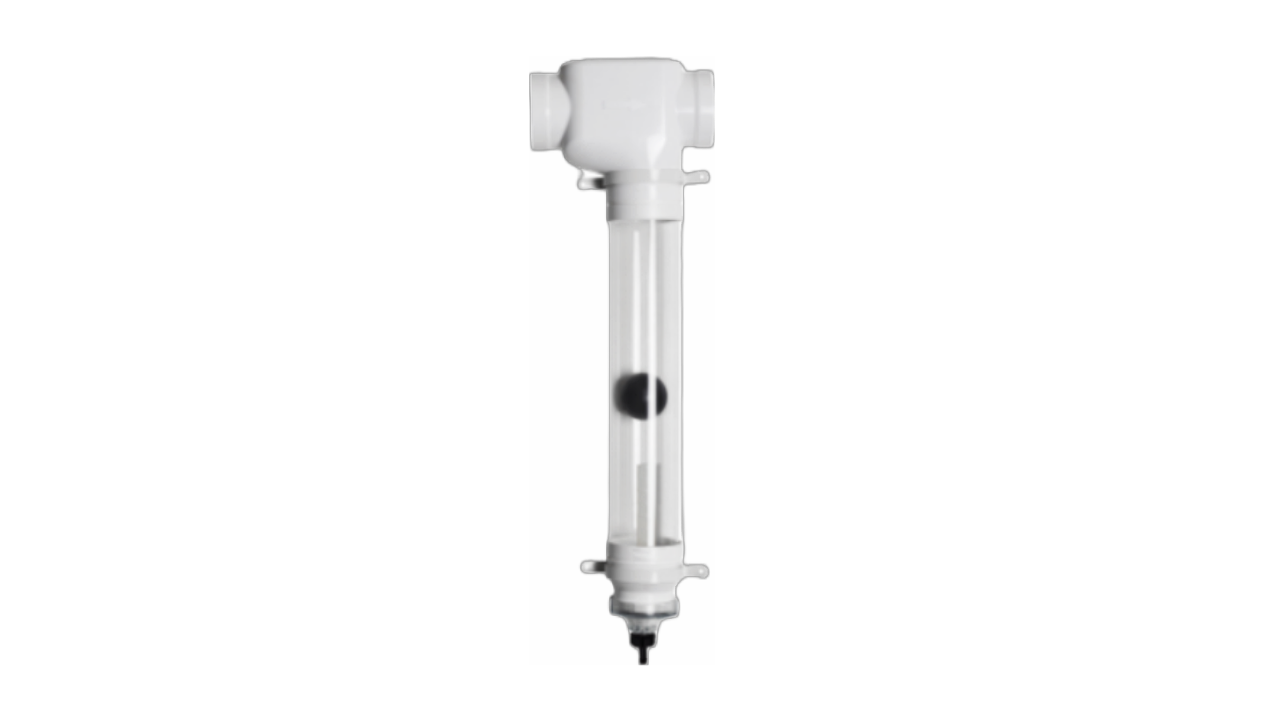
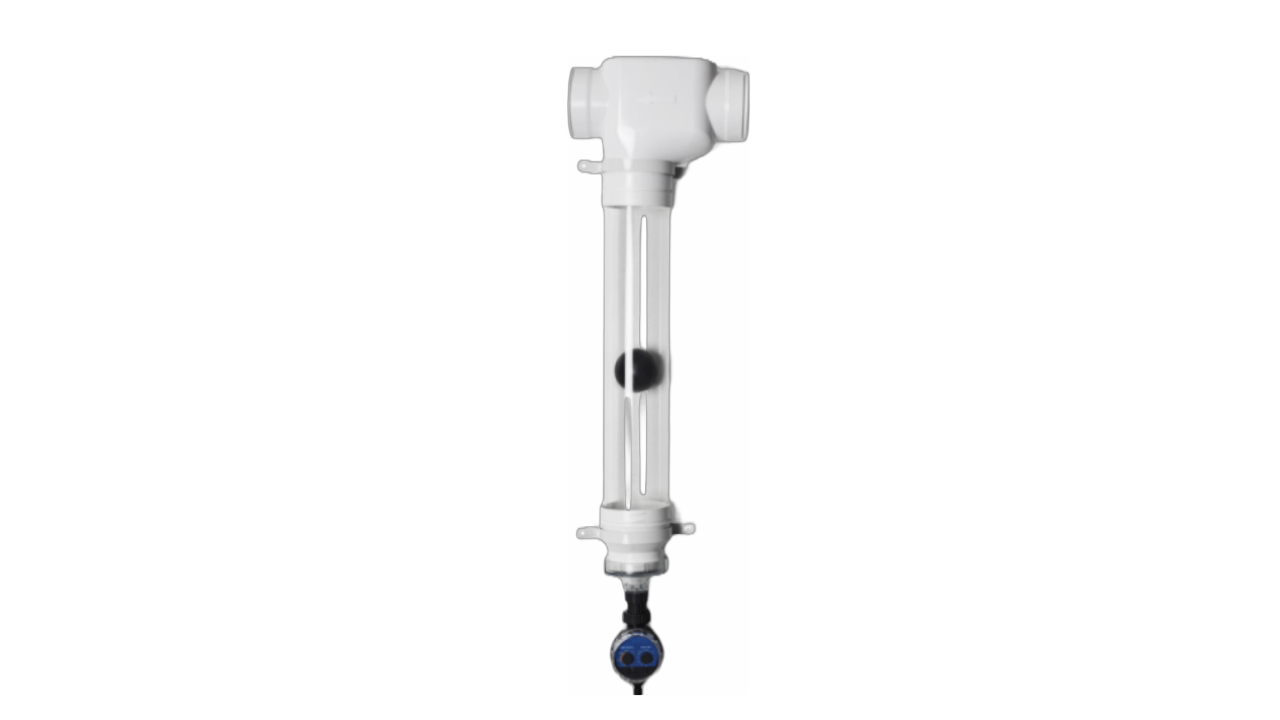
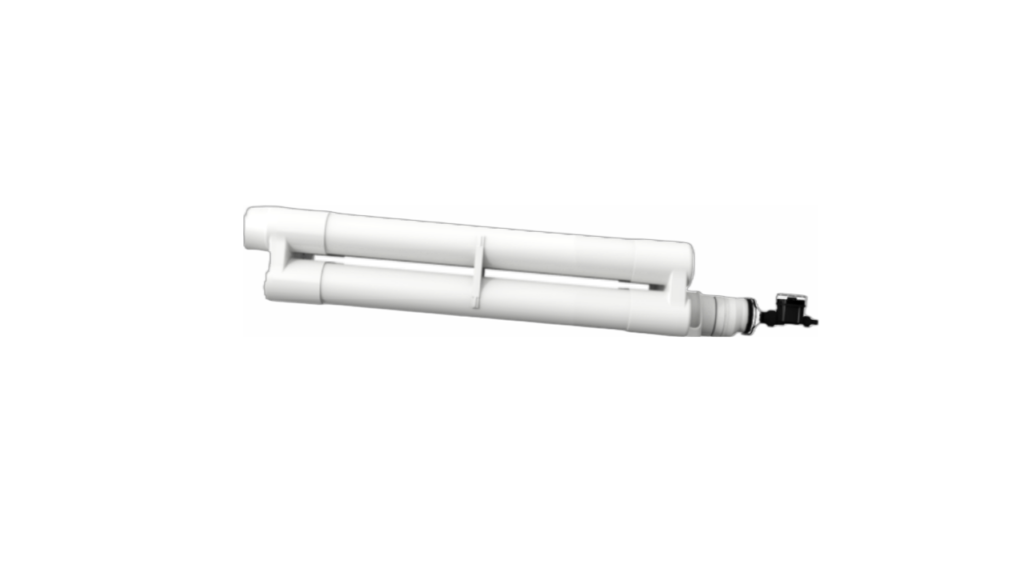
Most first flush devices are simple by design and feature only a few working parts. The main working parts of a first flush diverter include: (1) a water chamber, (2) a ball float, (3) a seat or seal, and (4) a release valve.
- The Water Chamber is a hollow tube that provides the space for the first volume of rainwater. The length and diameter of a diverter’s water chamber will depend on the amount of rainwater needed to be discarded. The water chamber is a simple tube closed off by a discharge valve at the bottom end, open with a seal at the top, and contains a buoyant ball that slowly rises as water fills the chamber.
- The Ball Float seals off the water chamber when it becomes full. The ball float, or sealing ball, provides both simplicity and automation for first flush devices. As the first rainfall water flows into the water chamber, the ball slowly rises with the water. When the chamber reaches full capacity, the ball rises to the top seat where it connects and seals off the diverter to restrict any more water from entering.
- The Seat or Seal is at the top of the water chamber, at the point where rainwater enters, and is used to form a seal with the ball float when the water chamber is full to allow cleaner rainwater to now flow to the collection container.
- The Release Valve is located at the base of the diverter chamber and is designed to slowly discharge rainwater collected in the water chamber.
First flush devices are designed to operate simply and on their own. They do not require electricity, are non-mechanical, and require limited manual interaction by the owner. The diverter chamber fills with water, the ball float and seat acts as a seal when full, and the release valve automatically discharges the wastewater to reset the first flush device for reuse.
When the water chamber fills with the allotted water volume, what should now be cleaner rainwater is allowed to flow past the first flush device and move downstream to the collection container.
Important Points on First Flush Installation
Many first flush devices available for purchase come as a DIY self-assembly kit and are fairly easy to install in your rainwater harvesting system. They are made for use with PVC pipe for incoming rainwater, outgoing rainwater, and the water chamber. This means piping will have to be added to your system if not already being used and will be an additional expense to account for. On the other hand, this makes it easier to install a leaf eater for debris removal as they also often connect to PVC pipe.
To get the most effective results from the first flush diverter, a few key points should be made on their installation.
Where to Install
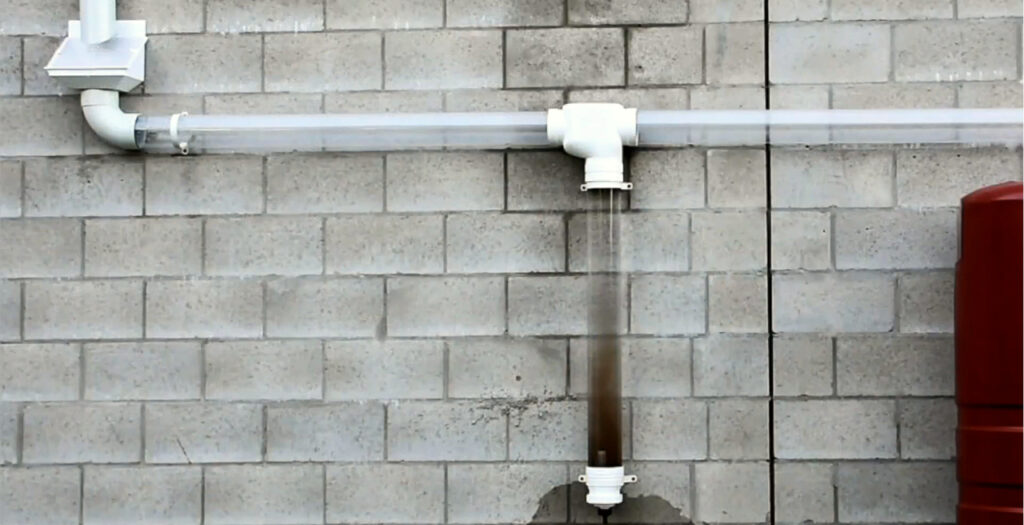
Above ground first flush devices should be installed between the downpipe or pipes that come from the roof and the collection container. If possible, it is recommended to connect all downpipes together to a single pipe before the water tank and install the first flush here. This setup will allow for only a single first flush diverter to be needed.
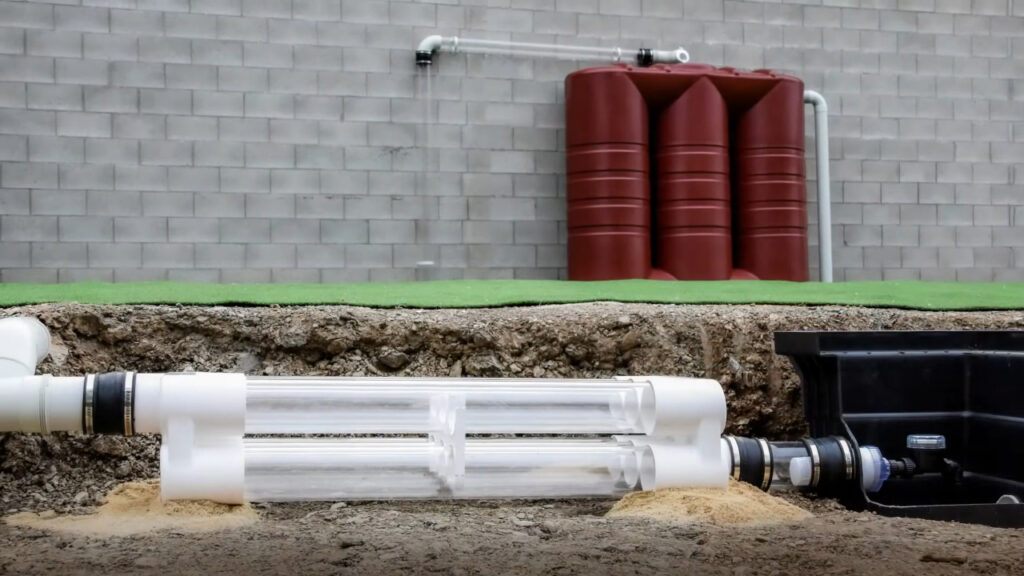
Underground or in-ground first flush diverters should be installed near the rainwater tank. This style is designed to accomplish the same end result as above ground diverters but will also successfully change a wet system to a dry system by draining any water remaining in the plumbing between rain events.
In large rainwater harvesting applications or scenarios with long plumbing runs underground, the system is a “wet” system if it holds water in plumbing even when not in use. Incorporating an in-ground first flush diverter provides a way for this held water to be discharged, effectively turning a wet system to a dry system in addition to its use as a first flush.
Recommended Complementary Accessories
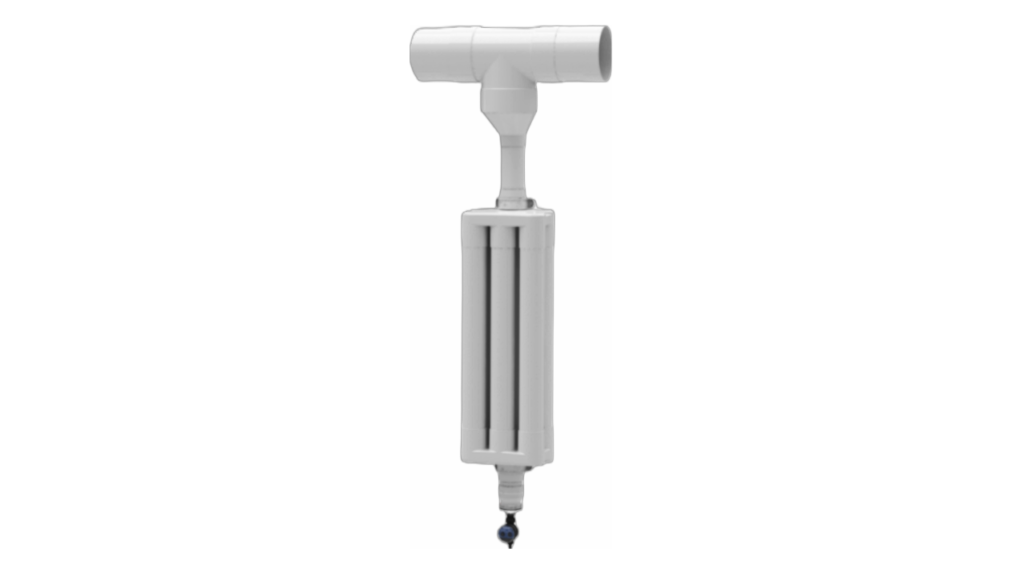
If not already included in the rainwater setup, leaf eaters are highly recommended as a complementary accessory to a first flush diverter. Leaf eaters, also known as rain heads, gutter filters, downspout screens, or debris excluders, are in-line filter screens designed to be installed in gutter downpipes and catch debris that can’t pass through a fine mesh screen.
Rain heads can successfully remove larger organic items such as leaves, sticks, seeds, feathers, etc. They complement the function of a first flush diverter by limiting the amount of material collected or that may get stuck in the diverter.
Both the Clean Rain Advanced and Clean Rain Ultra combine the technology of both a leaf eater and first flush diverter in an all-in-one rain harvesting accessory.
How to Setup and Use a First Flush Device
There are a few key points when it comes to successful setup and use of a first flush device. When using a first flush, it is important to consider the total volume of polluted water you estimate will need to be discarded as it directly relates to properly sizing the length of the first flush water chamber.
Sizing the first flush water chamber is DIY and this part of the accessory is to be supplied by the owner. Most first flush accessories are made to be used with standard Schedule 40 PVC pipe as the DIY water chamber. Most first flush devices are sized for use with either 3” or 4” PVC pipe.
First flush devices can be either too small or too large, and either scenario will affect the rain harvest outcome.
- When the first flush is too small, the water chamber is not long enough and not enough contaminated rainfall may be diverted, which means some may reach the storage tank.
- When the first flush is too large, the water chamber is too long and clean water may end up being discharged rather than collected in the rain container.
Recommended Amount of Rainwater Volume to Divert Based on Expected Pollution:
There are two calculations related to setting up and using a first flush.
- The first can be used to approximate the amount of rainwater volume that should be diverted based on catchment area and potential contaminate amounts.
- The second can be used to determine the size of the water chamber required to discard the most amount of dirty rainwater so it is not too small or too large.
Most rainwater setups are unique, and the volume of first flush required and the accessory’s size will depend on the roof’s total square footage and the average amount of regular pollution.
Calculation for Expected Amount of Pollution
To determine the amount of water for first flush diversion based on expected amount of pollution:
- Limited Pollution — defined as relatively clean rainwater, as in a system located in an open environment without trees and without regular animal activity that can lead to debris or other matter on the roof.
- Recommended Rainwater Volume for Diverting = Roof Area (square feet) x 0.00125 Gallons
- Increased Pollution — defined as roof area having frequent organic matter from vegetation and animals, as in a system possibly located in a wooded area.
- Recommended Rainwater Volume for Diverting = Roof Area (square feet) x 0.005 Gallons
After approximating the total rainwater volume that needs to be diverted, the diameter and length of the first flush water chamber needs to be determined.
Length of the Diverter Chamber
To determine the length of the first flush water diverter chamber, use the following measurement standards and capacities:
- For 3″ First Flush Diverters:
- Material: Install 3” PVC Pipe Schedule 40
- Capacity: Approximately 0.384 gallons of rainwater can be held in every 1 foot of 3″ PVC pipe.
- For 4″ First Flush Diverters:
- Material: Install 4” PVC Pipe Schedule 40
- Capacity: Approximately 0.661 gallons of rainwater can be held in every 1 foot of 4″ PVC pipe.
- For 12″ First Flush Diverters:
- Material: Install 12” PVC Pipe Schedule 40
- Capacity: Approximately 5.814 gallons of rainwater can be held in every 1 foot of 12″ PVC pipe
Notes:
- Potable water grade, white PVC pipe should be used. Do not use PVC pipe labeled as DWV (Drain, Waste, Vent) pipe. Potable water PVC pipe will have an ANSI/NSF 61 and/or ANSI/NSF 14 label stamped on the pipe.
- Clear PVC pipe also makes a good option for the diverter chamber as it allows for easy visualization of the first flush interior to see if it needs to be cleaned.
- The above values are approximate and general recommendations as a helpful guideline in building and installing a first flush diverter. The more initial rainfall that gets diverted the overall cleaner the following rainwater should be.
- For setups that require a lengthy water chamber for the first flush, such as greater than 10 feet, using multiple first flush diverters or a commercial first flush diverter may make a good choice.
How To Clean a First Flush Diverter
The first flush device may need to be cleaned on occasion if the discharge valve at the bottom empties too slowly or not at all. Sediment and other particulates may have accumulated inside the flush chamber causing a blockage.
To clean, simply remove the bottom screw connection on the diverter and wash these parts using clean water, ensuring water flows through the discharge port after cleaning. A hose with a spray nozzle can be used to spray up and inside a first flush diverter to rinse the chamber as needed.
Winterization Instructions
If you live in an area with freezing winters and recommendations for annual winterizing of your property and equipment, then your first flush device should be included on your to-do list.
To properly winterize a first flush, simply remove the discharge cap on the bottom of the water chamber prior to a hard freeze. By removing the bottom cap, the first flush will drain, dry, and no longer be able to fill with water that could remain inside the chamber and freeze during low temperatures that could potentially damage the first flush device due to ice expansion.
Takeaway | First Flush Diverters Explained
Ending up with harvested rainwater in your collection tank is great – if it’s clean. However, it’s not so great to end up with water polluted by organic debris, inorganic particulates or even harmful chemicals that are the result of human activities. Incorporating a first flush diverter can successfully flush away many unwanted materials that may be present in the first rainfall, leaving you with higher quality rainwater much better suited for your uses.
If looking for rainwater harvesting products, you can find our available rain harvesting accessories here and our rainwater collection tanks here.
For more information, help in product selection, or questions on ordering, contact us, our support team is always ready to help. For more on rainwater harvesting, check out our Rain Tanks Series posts.